Project Type:
Team Project | Electronic Revolution Studios | Lead Designer | Level Designer
About the Game
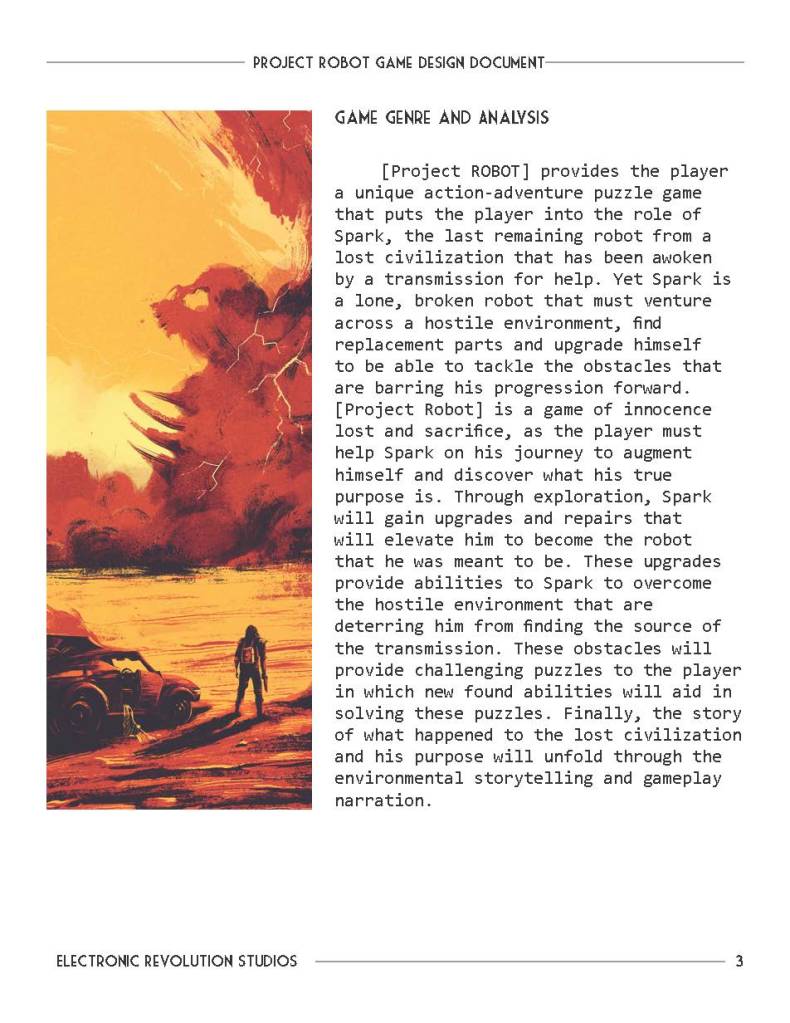
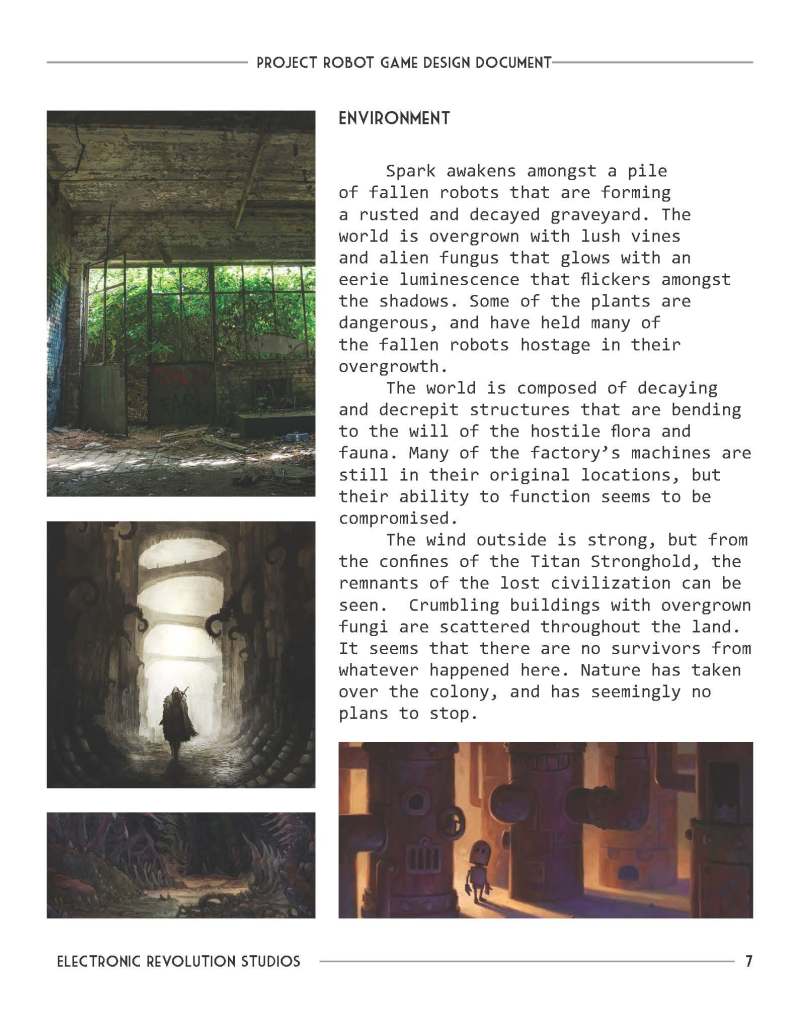
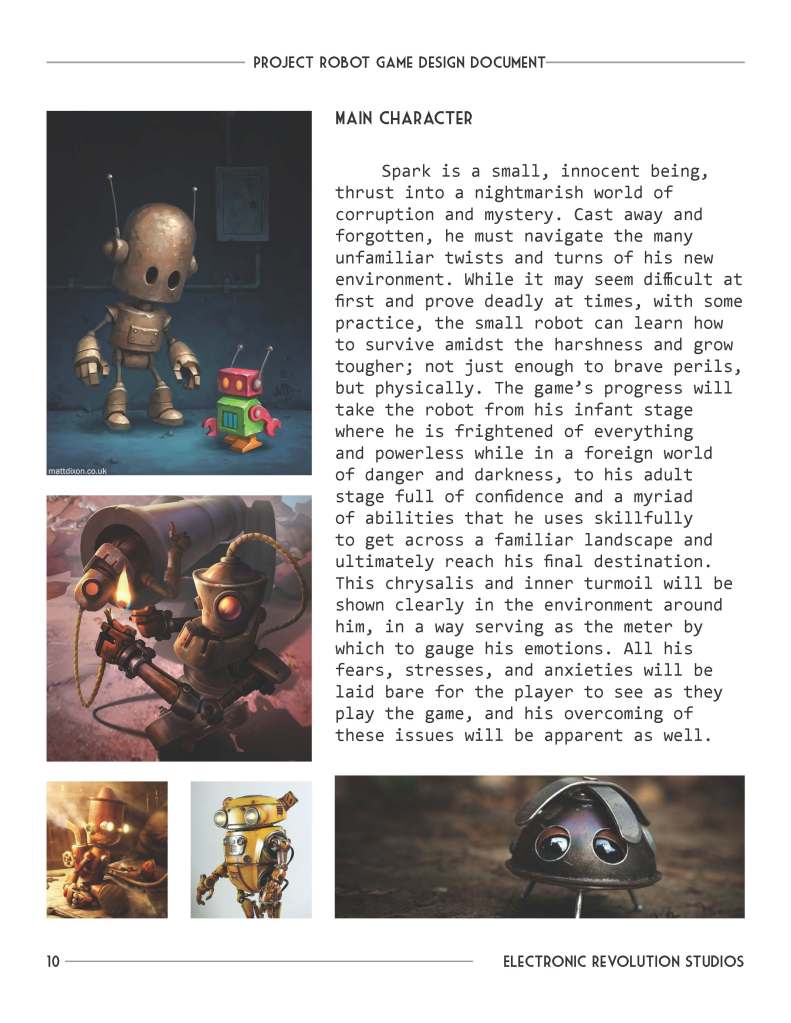
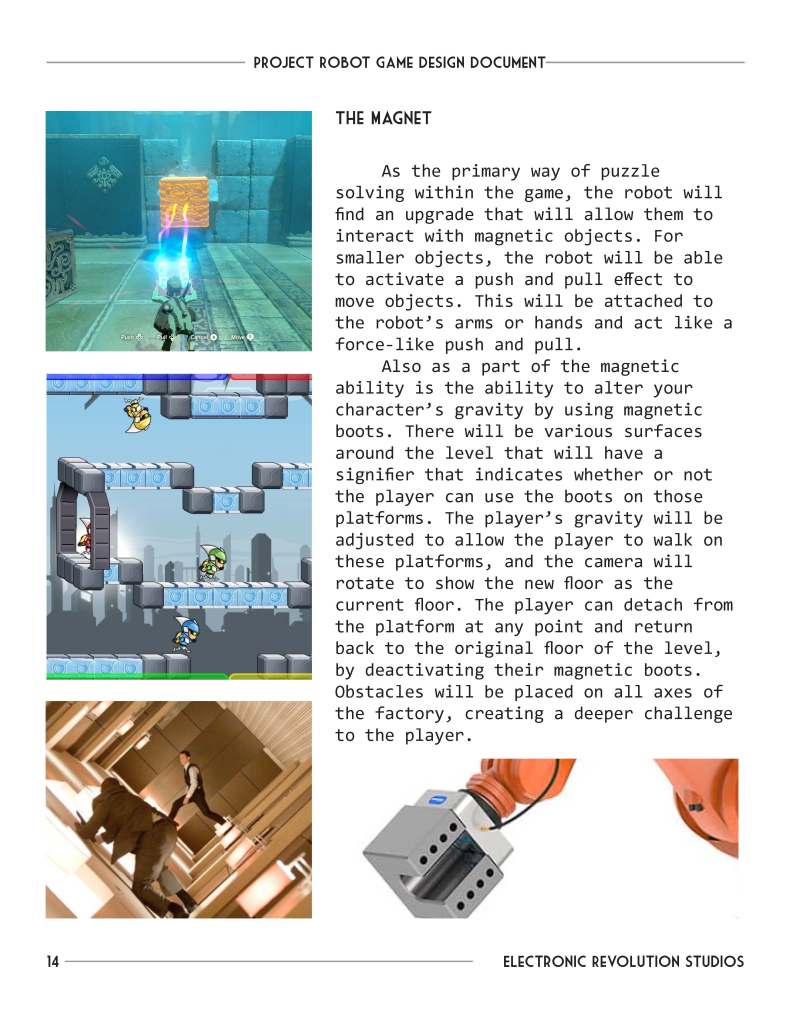
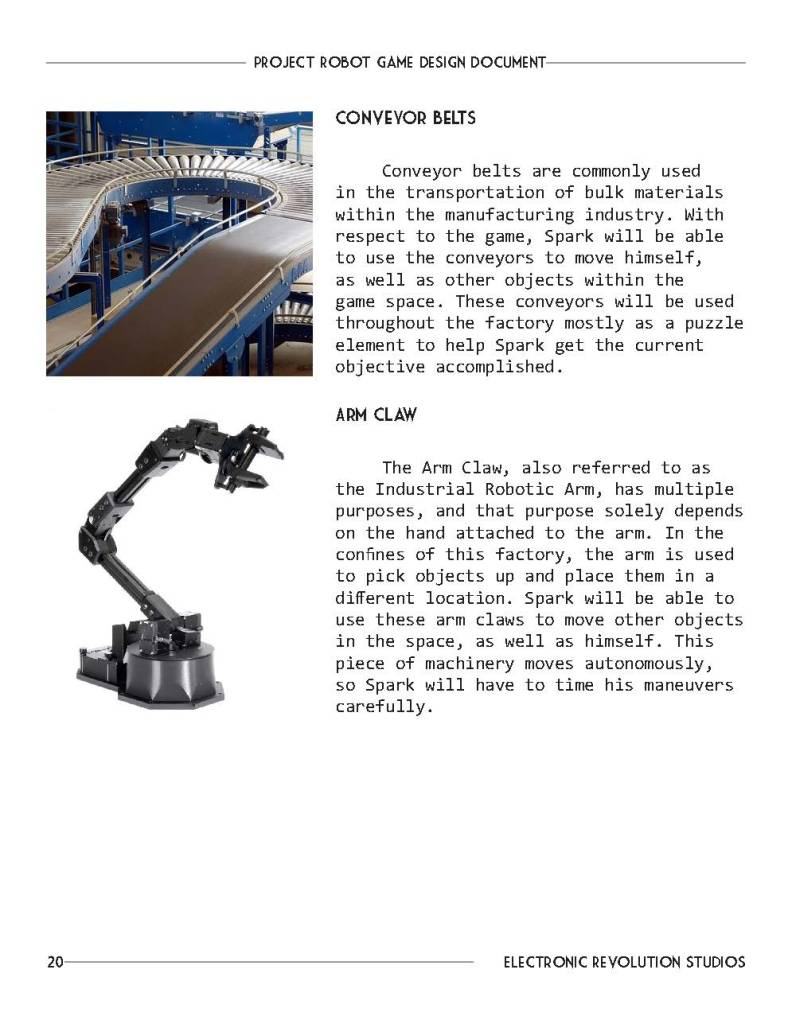
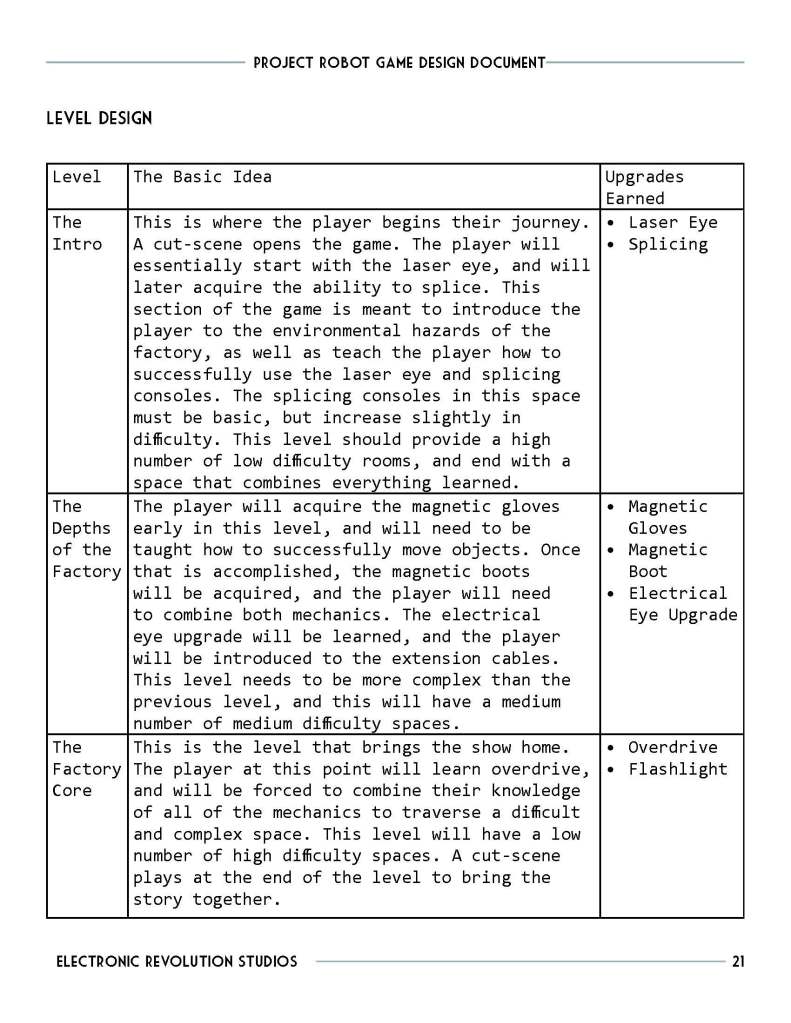
The Last Spark is a puzzle platformer that takes place inside of an abandoned factory. In this factory, the main character, Spark, wakes up to realize he is the last living robot left within. To save the factory, and its inhabitants, Spark must venture through the depths of the factory, solving puzzles and jumping past obstacles, to get to the end and restart the factory. Throughout the game, Spark upgrades his body, giving him new abilities with each. These abilities are a laser eye, magnetic gloves, magnetic boots, and a flashlight.
Link To Steam Page:
https://store.steampowered.com/app/1718020/The_Last_Spark/
Software Used:
- Unreal Engine 4 – UE4 was used as the game engine. UE4 was used from the early phases of action blocking, all the way through the final product.
- Jira – This software was used for all task tracking elements of the project.
- Perforce– This software was used for source control throughout the whole project.
- Toggl – Used in conjunction with Jira for time tracking.
- Adobe Illustrator and Photoshop– These two softwares were used to create the digital layouts, reference board, and mood board for the project. Photoshop was also used throughout the project to make quick sketches in the middle of meetings, to better help explanations.
- Maya – This software was used to create some proxy assets within the whiteboxing phase.
- Adobe After Effects – This software was used to put together the monthly status update videos.
Full Gameplay Video:
Check our full gameplay video!
The video below shows the second level of The Last Spark, which I was responsible for. This video was created on May 14, 2021. In the video, I spoke about some of the decisions behind the level.
Responsibilities:
- As the Lead Designer, I was responsible for a group of four people including myself. I delegated tasks to each member of the Design Team regularly. Created and maintained the game’s design and Game Design Document. Critiqued, rejected, and approved tasks submitted by the Design Team.
- Documented the Design Team’s work.
- Worked closely with the Programming Lead and Art Lead.
- Hand sketched action blocks and built them in engine
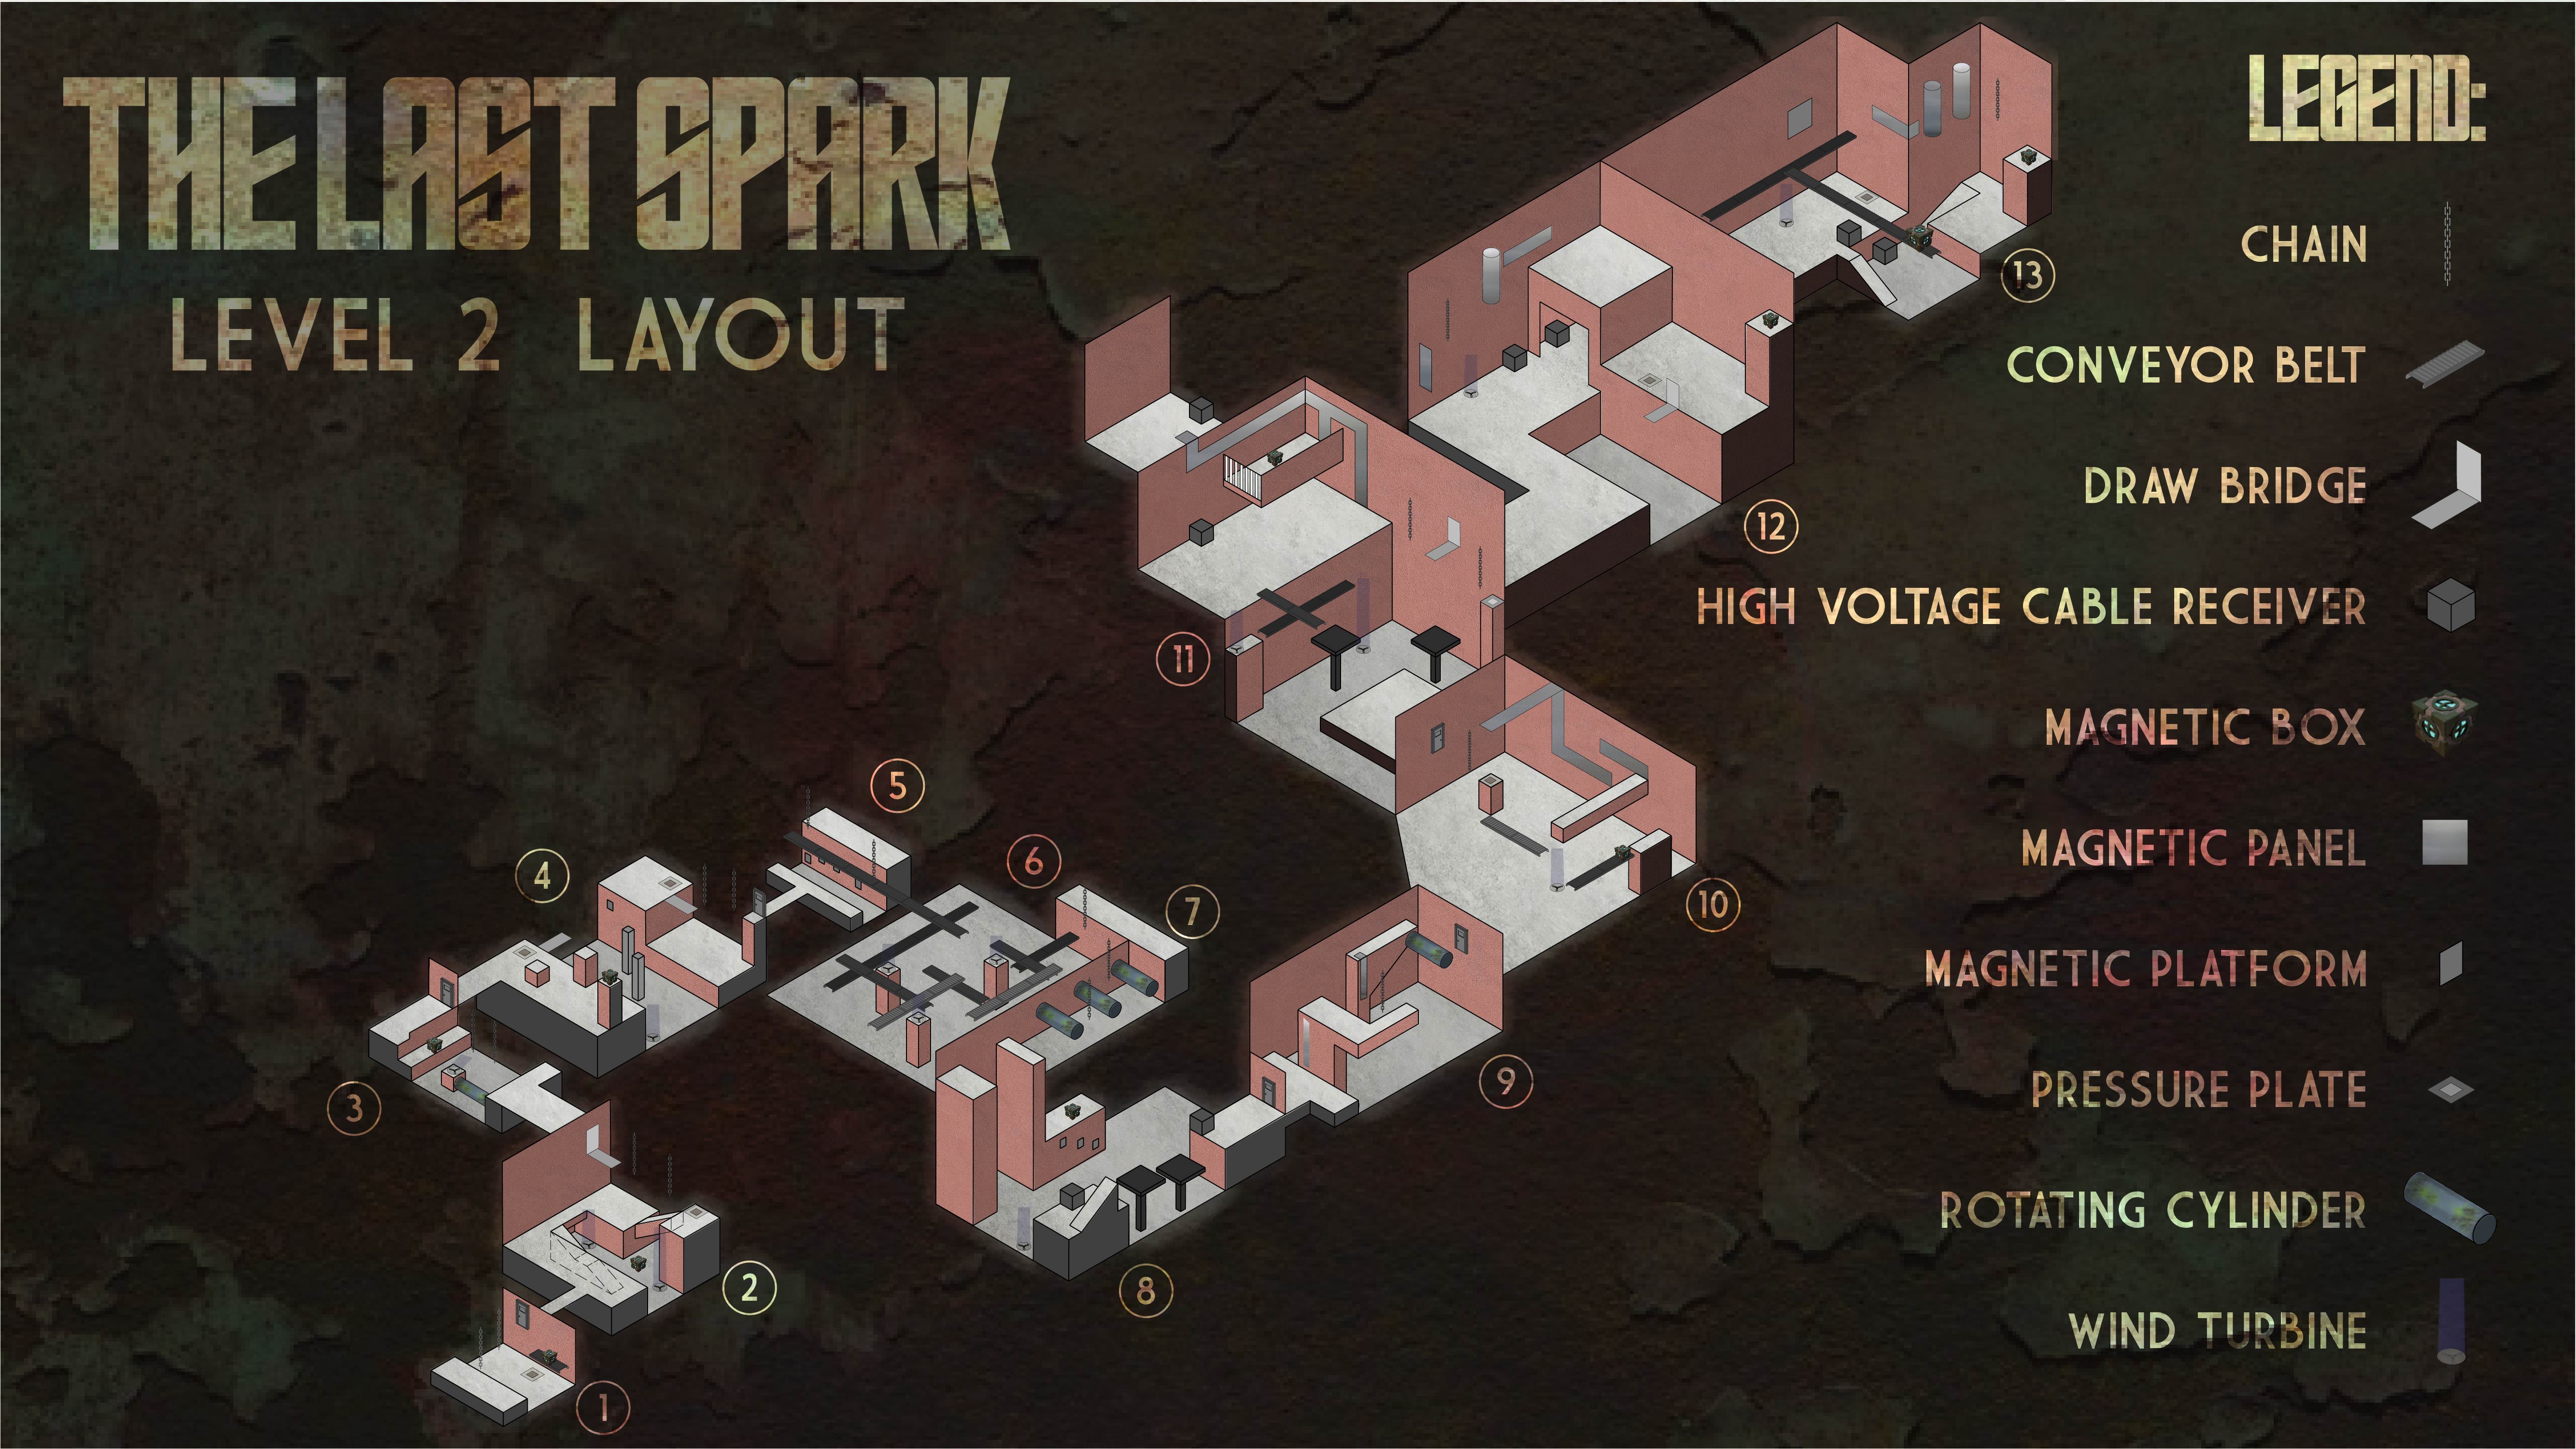
- Created a level layout for Level 2.
- Whiteboxed the entirety of Level 2, and iterated accordingly.
- Lead multiple playtesting sessions.
- Added architectural features to Level 2.
- Fully lit Level 2, with the help of our lighting artist.
- Set dressed Level 2.
The Process:
Step 1: Brainstorming and The Creation of the Game Design Document (GDD)
At this point in the project, the team had just formed. We were still in the process of determining the total scope of the project. In these early weeks, we tried our best to understand the strengths and weaknesses of our team. One thing we noticed right away was that we had a strong character artist and a strong character animator. This helped us determine who (or in our instance, what) our main character would be. With this information, as well as other personal knowledge gained, I led the design team through the brainstorming process. We would sit down for about an hour and work through some core design ideas, such as setting and target audience. By the end of these meetings, we had certain ideas set in stone to help us further the design process. After a few weeks, the team was able to put together the following GDD, which was the initial Game Design Document used to start the production phase of the process.


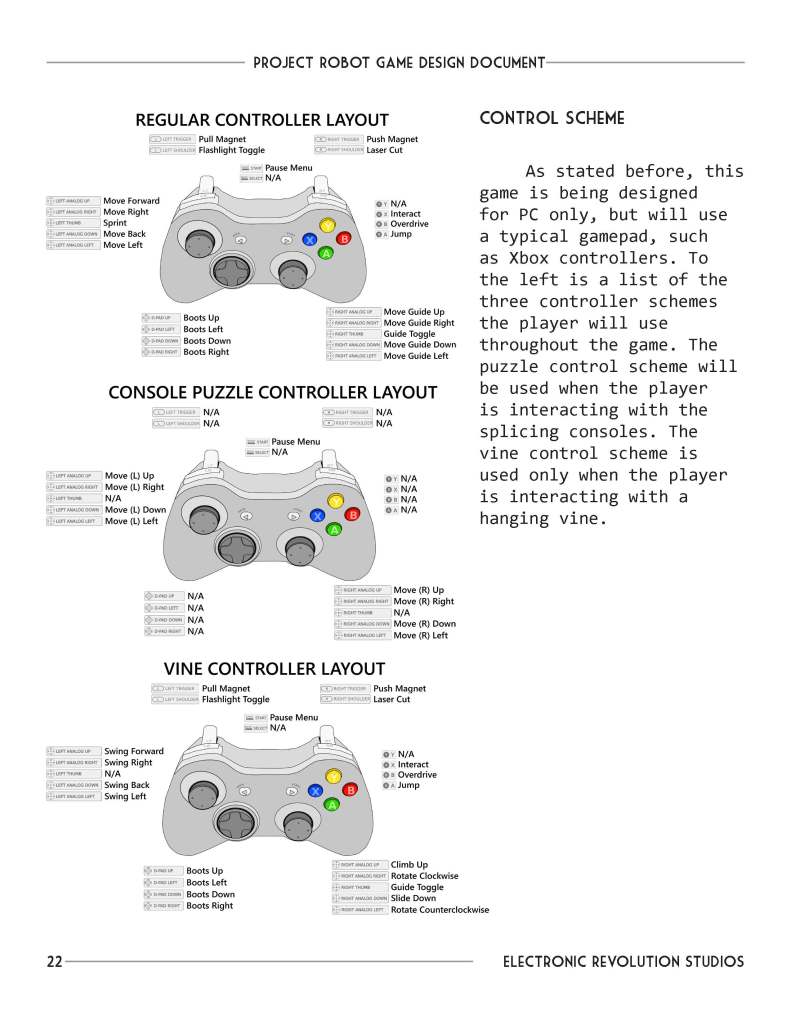
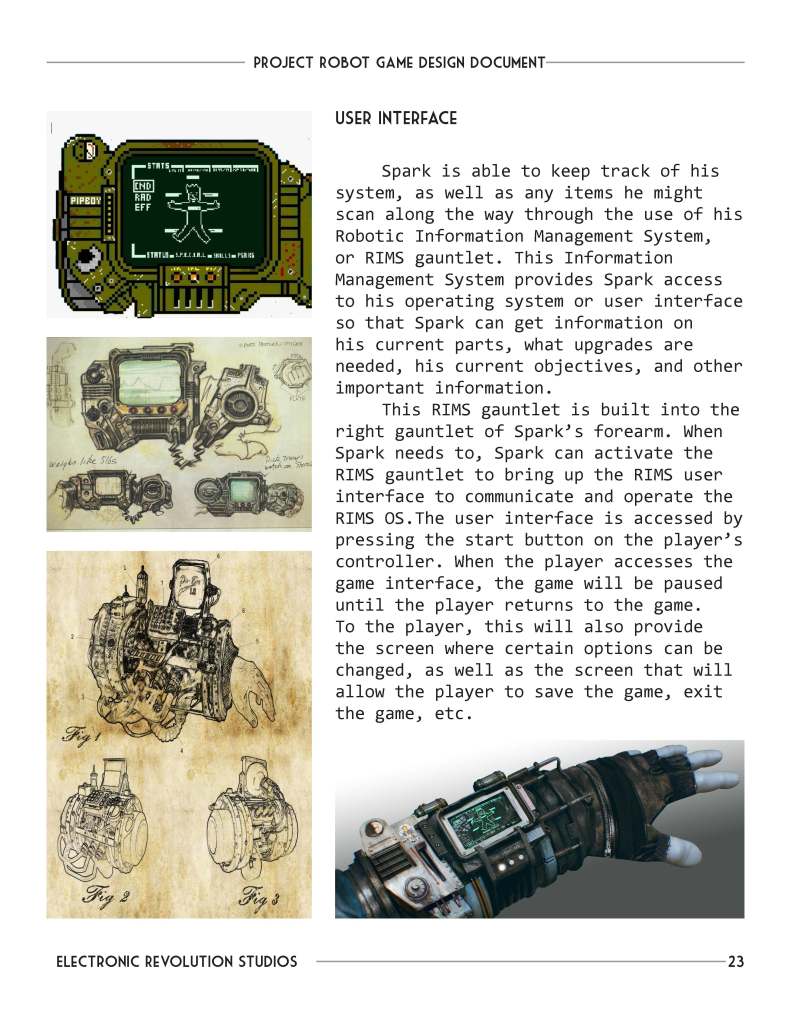
*All imagery in the GDD is found imagery, excluding the controller layout images.
Step 2: Creation of the ACtion Blocks
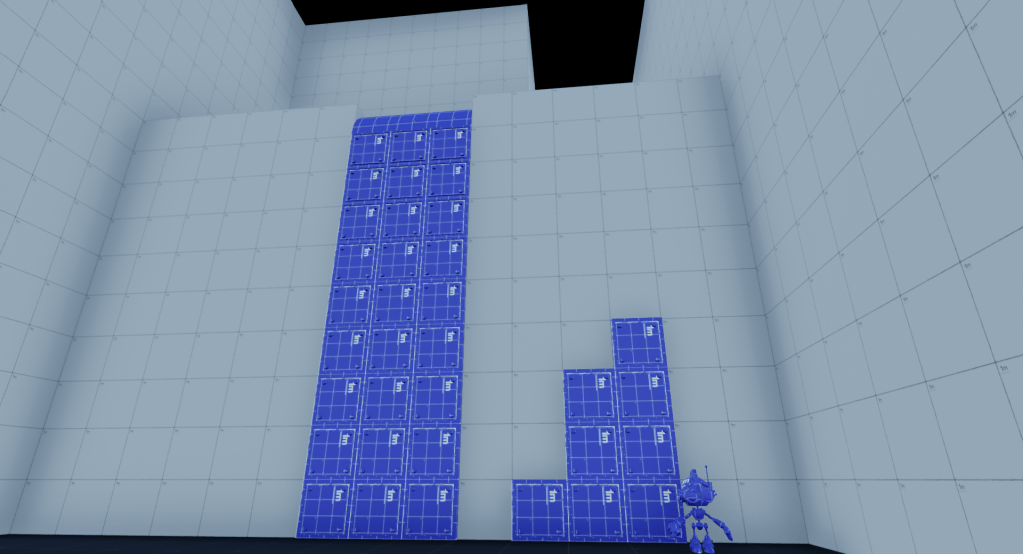
At the start of any project, a level designer’s first job is to understand what tools and features we have to work with. But since our project was just beginning, these tools weren’t ready in the game engine yet. So, I asked each level designer on the team (including myself) to come up with unique action blocks and draw them by hand. Below are the 11 action blocks that I drew for the project. I chose to draw them in isometric, which makes it easier to see things in 3D, especially since our game had a lot of vertical elements.
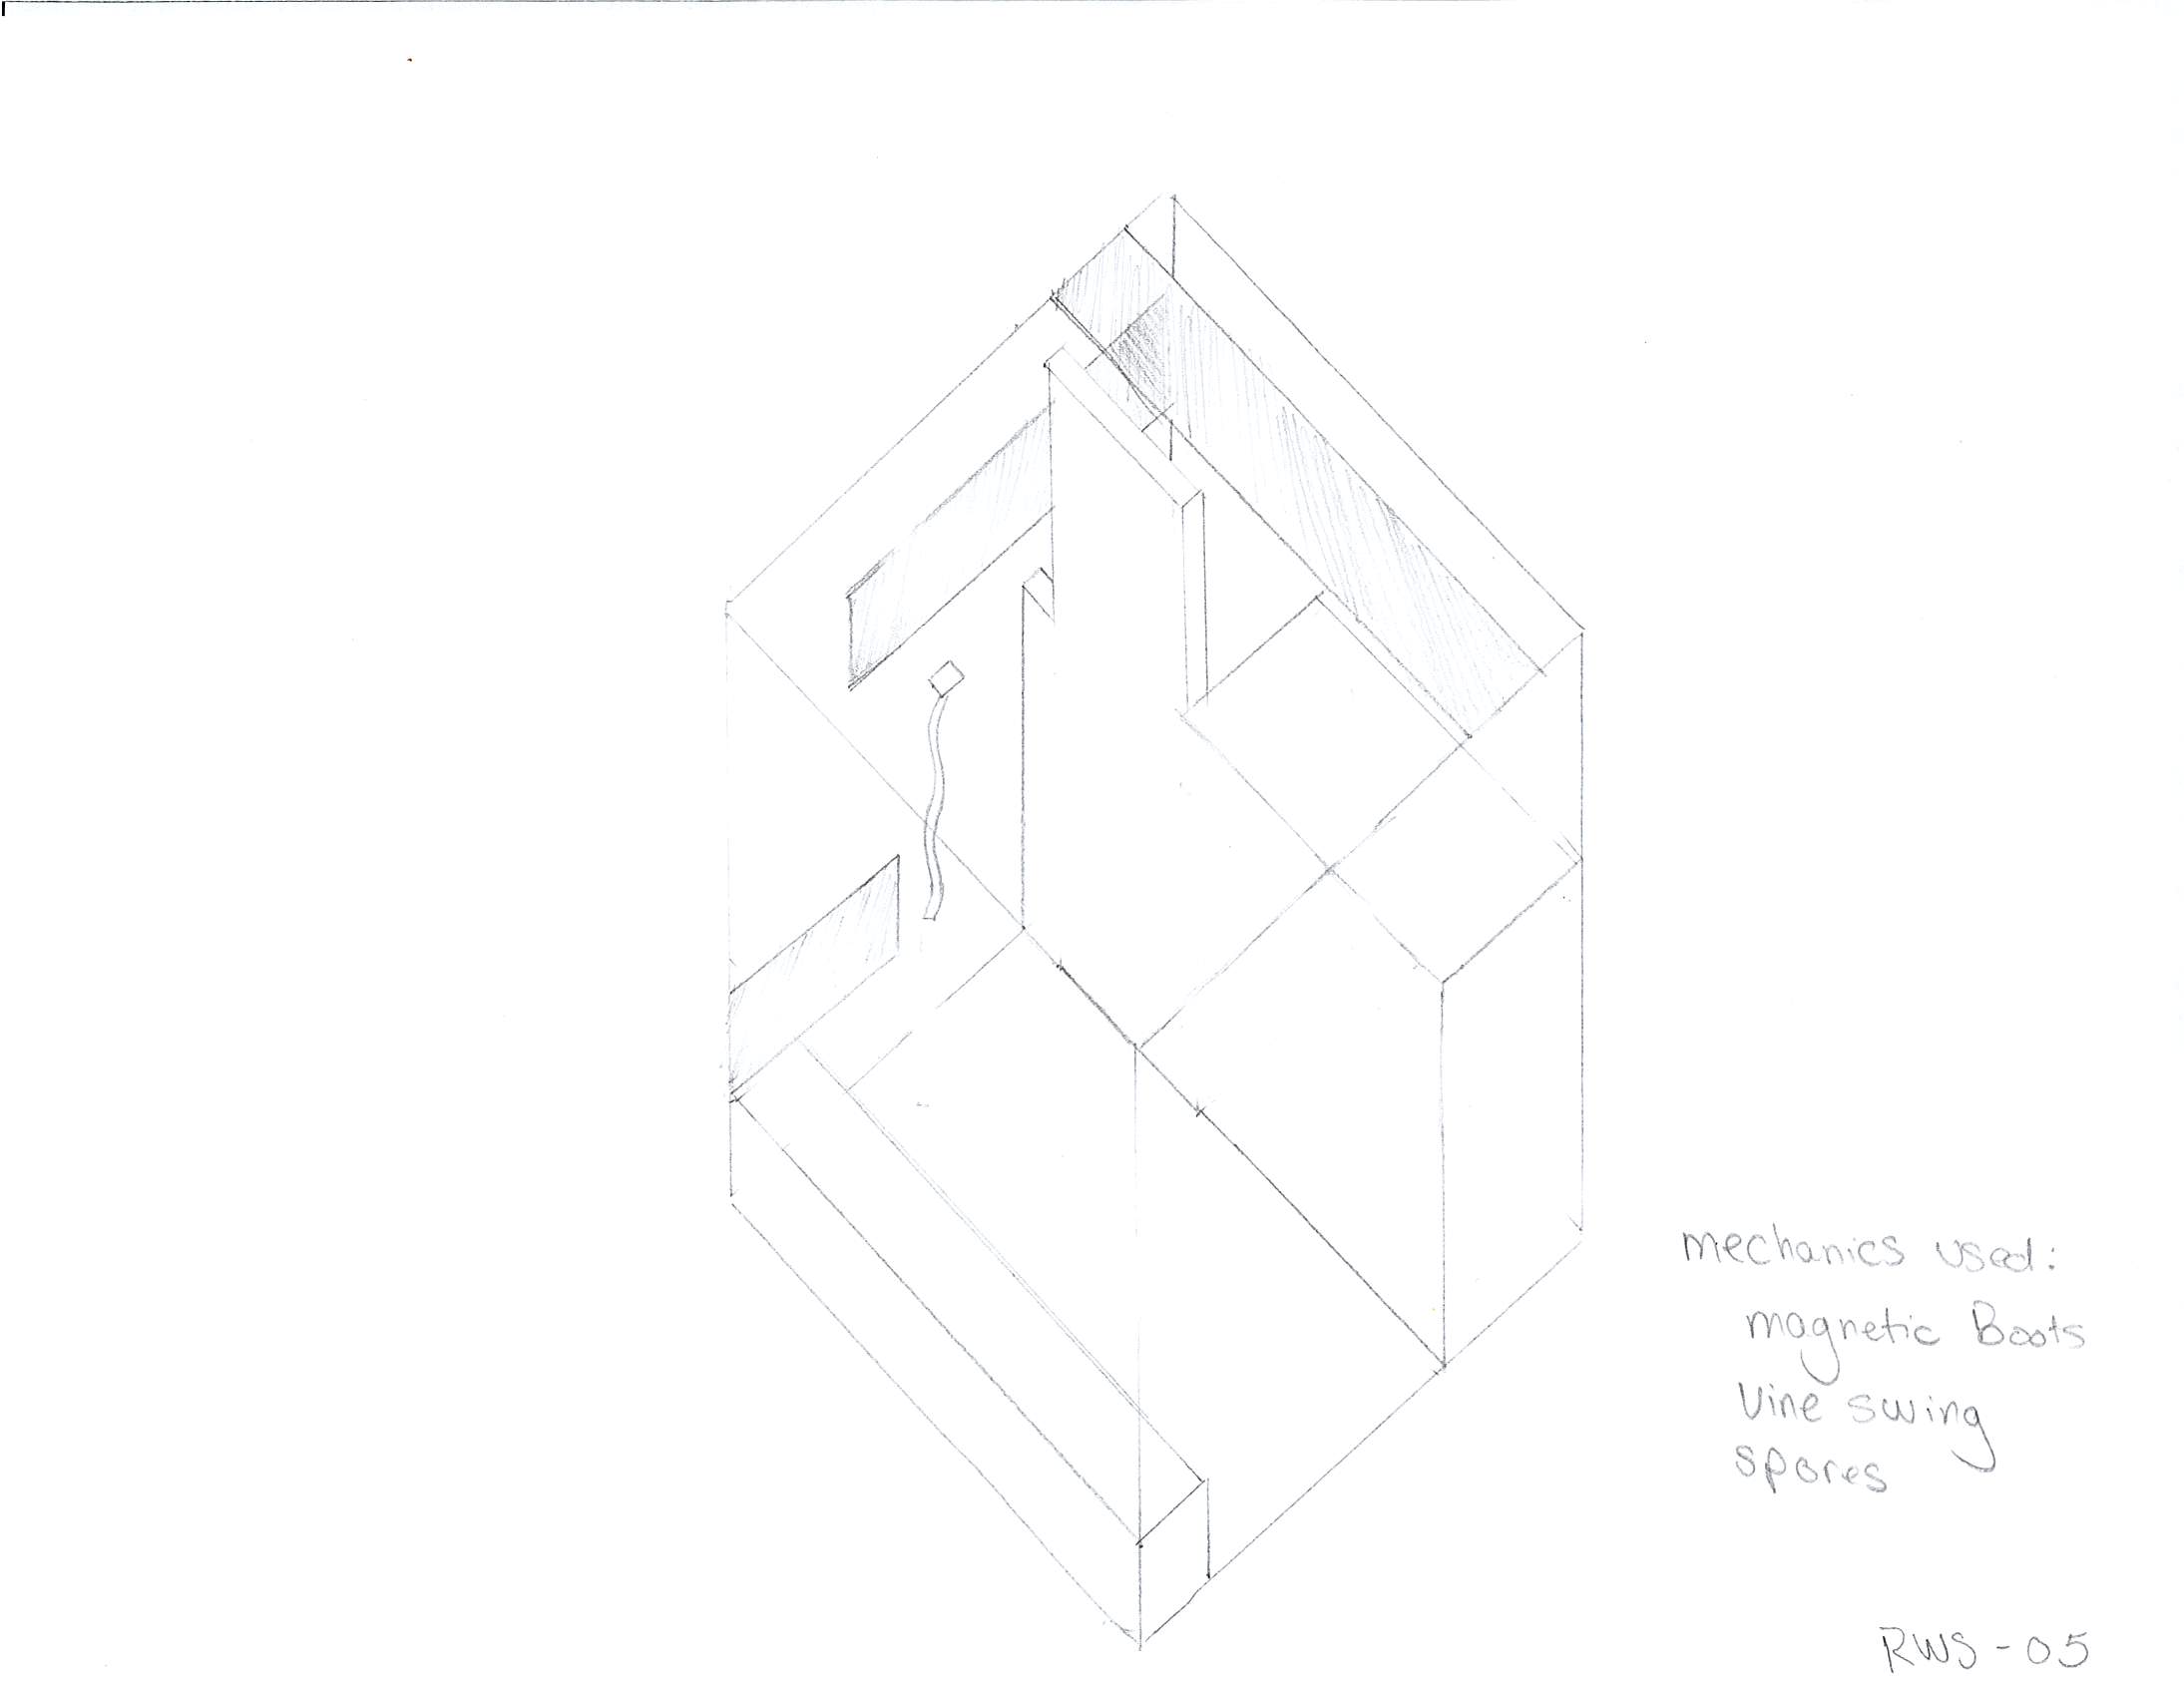

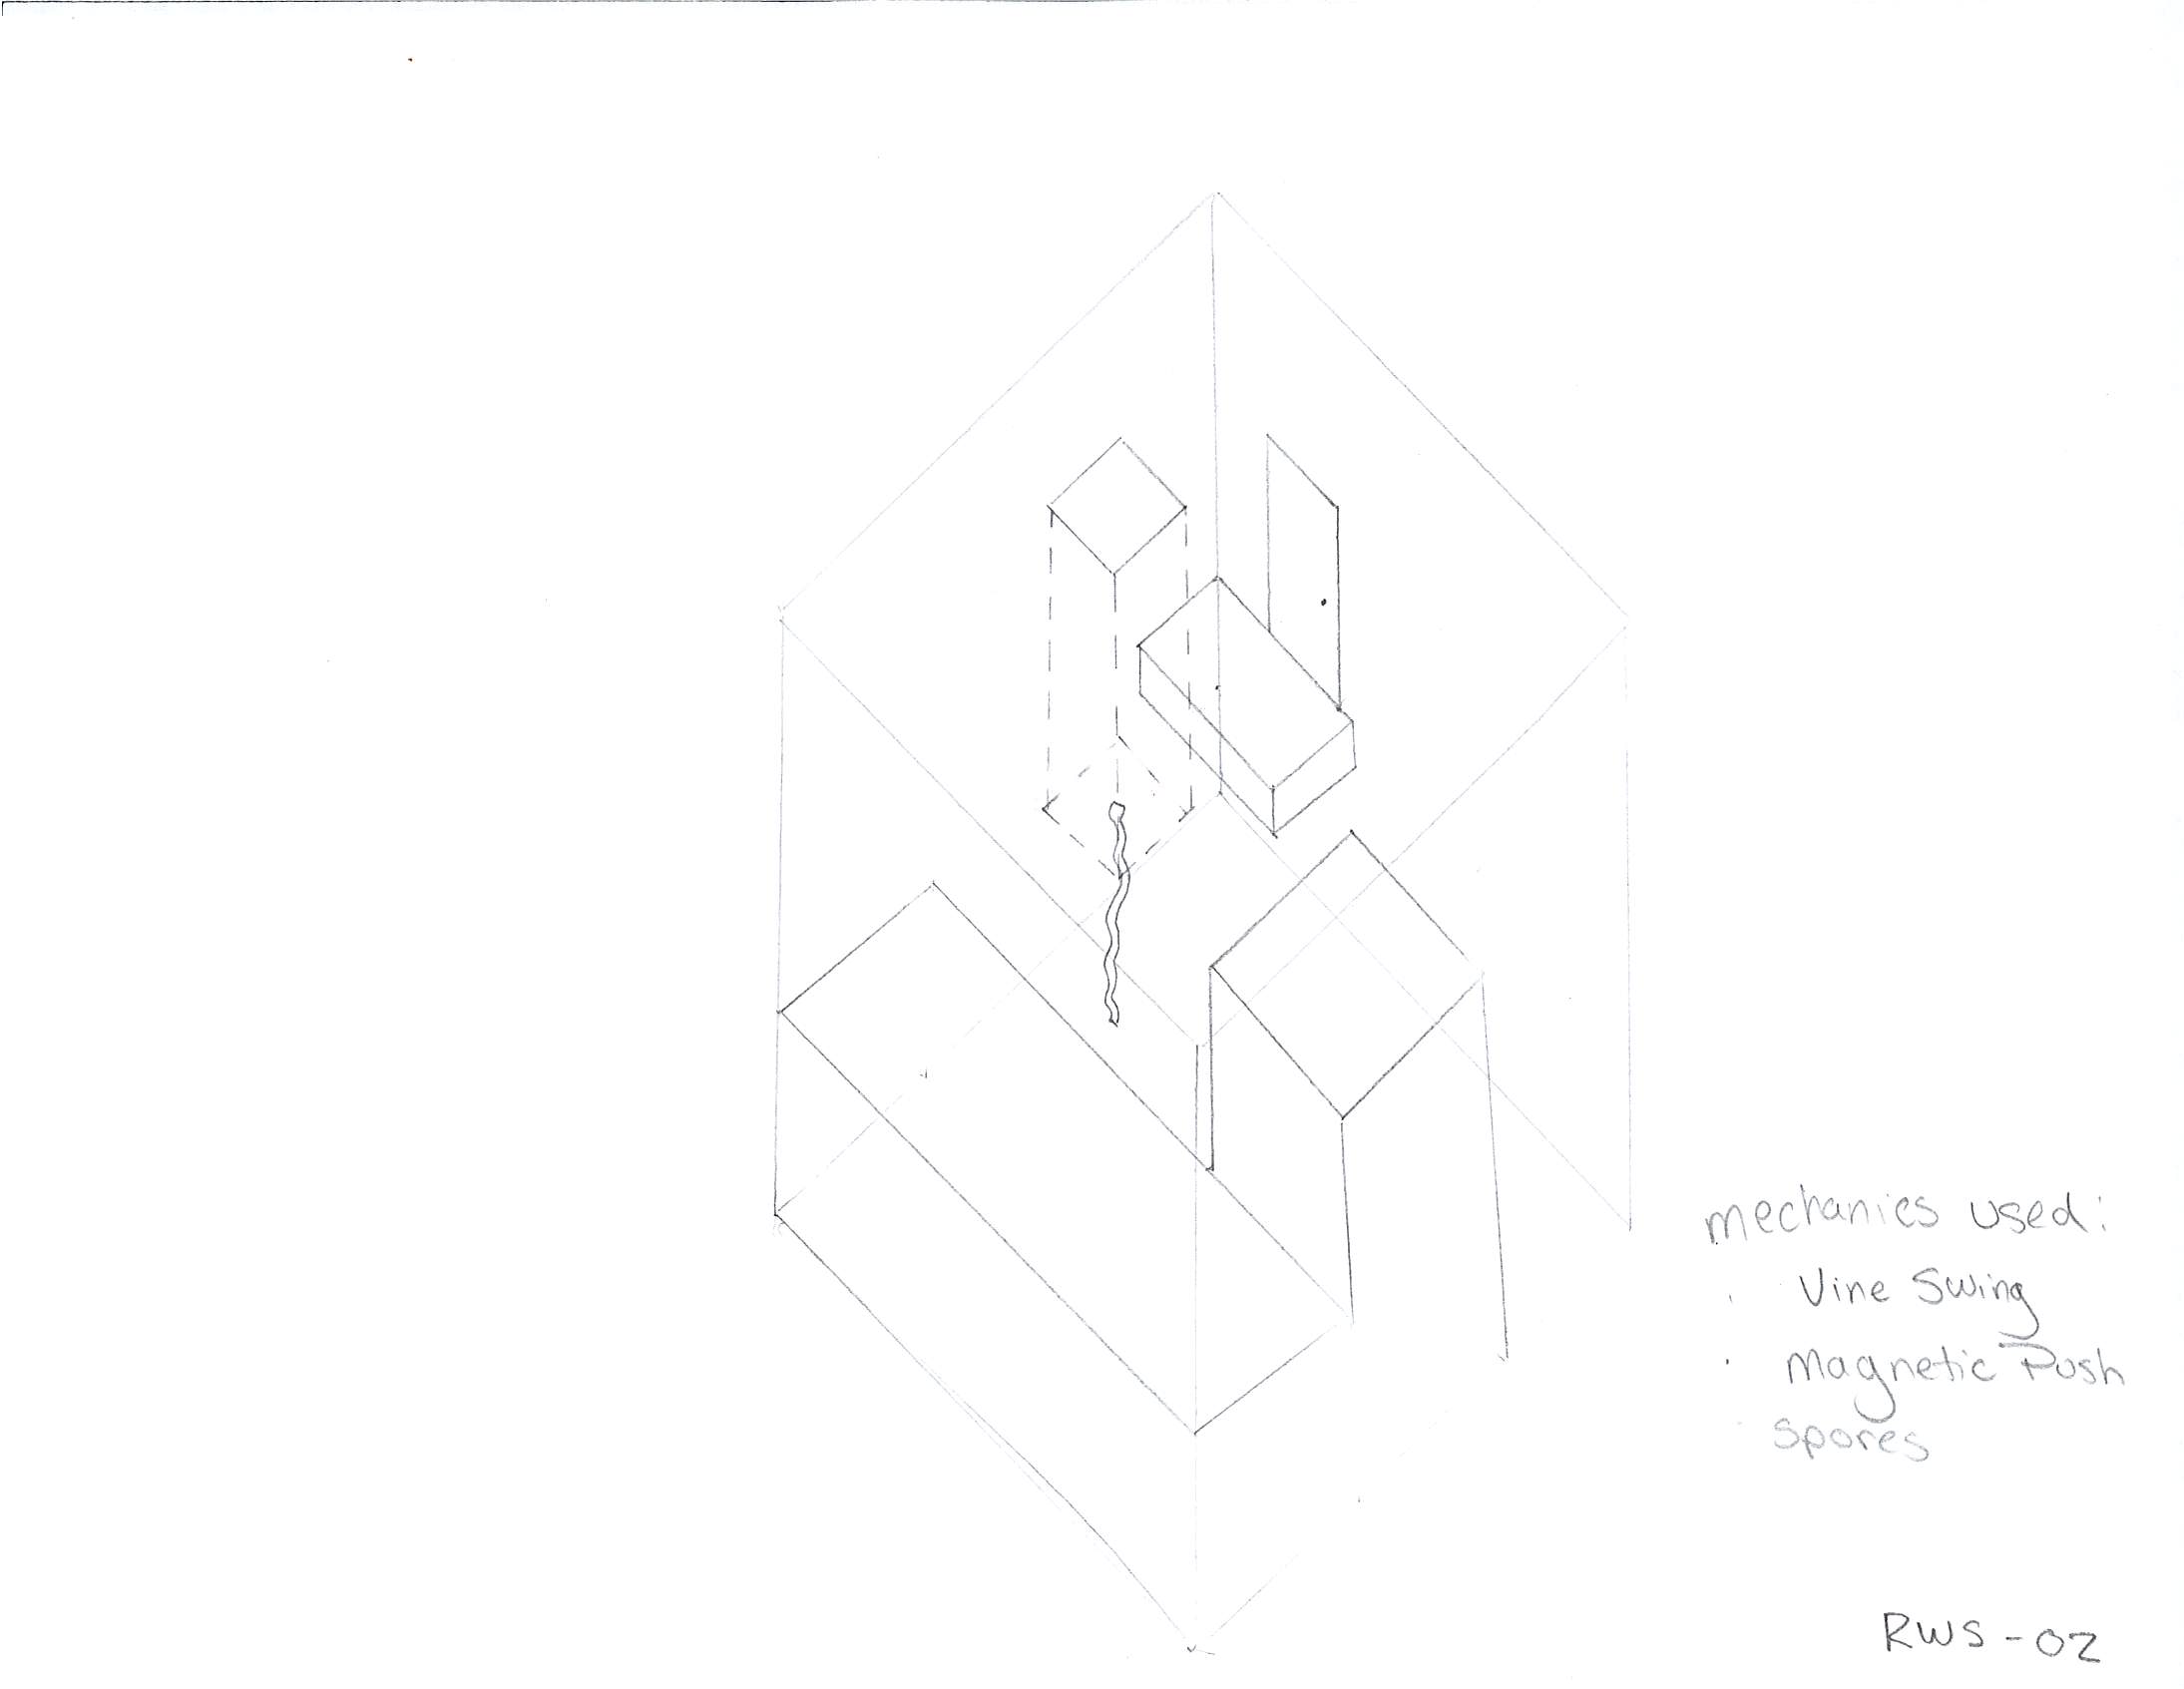


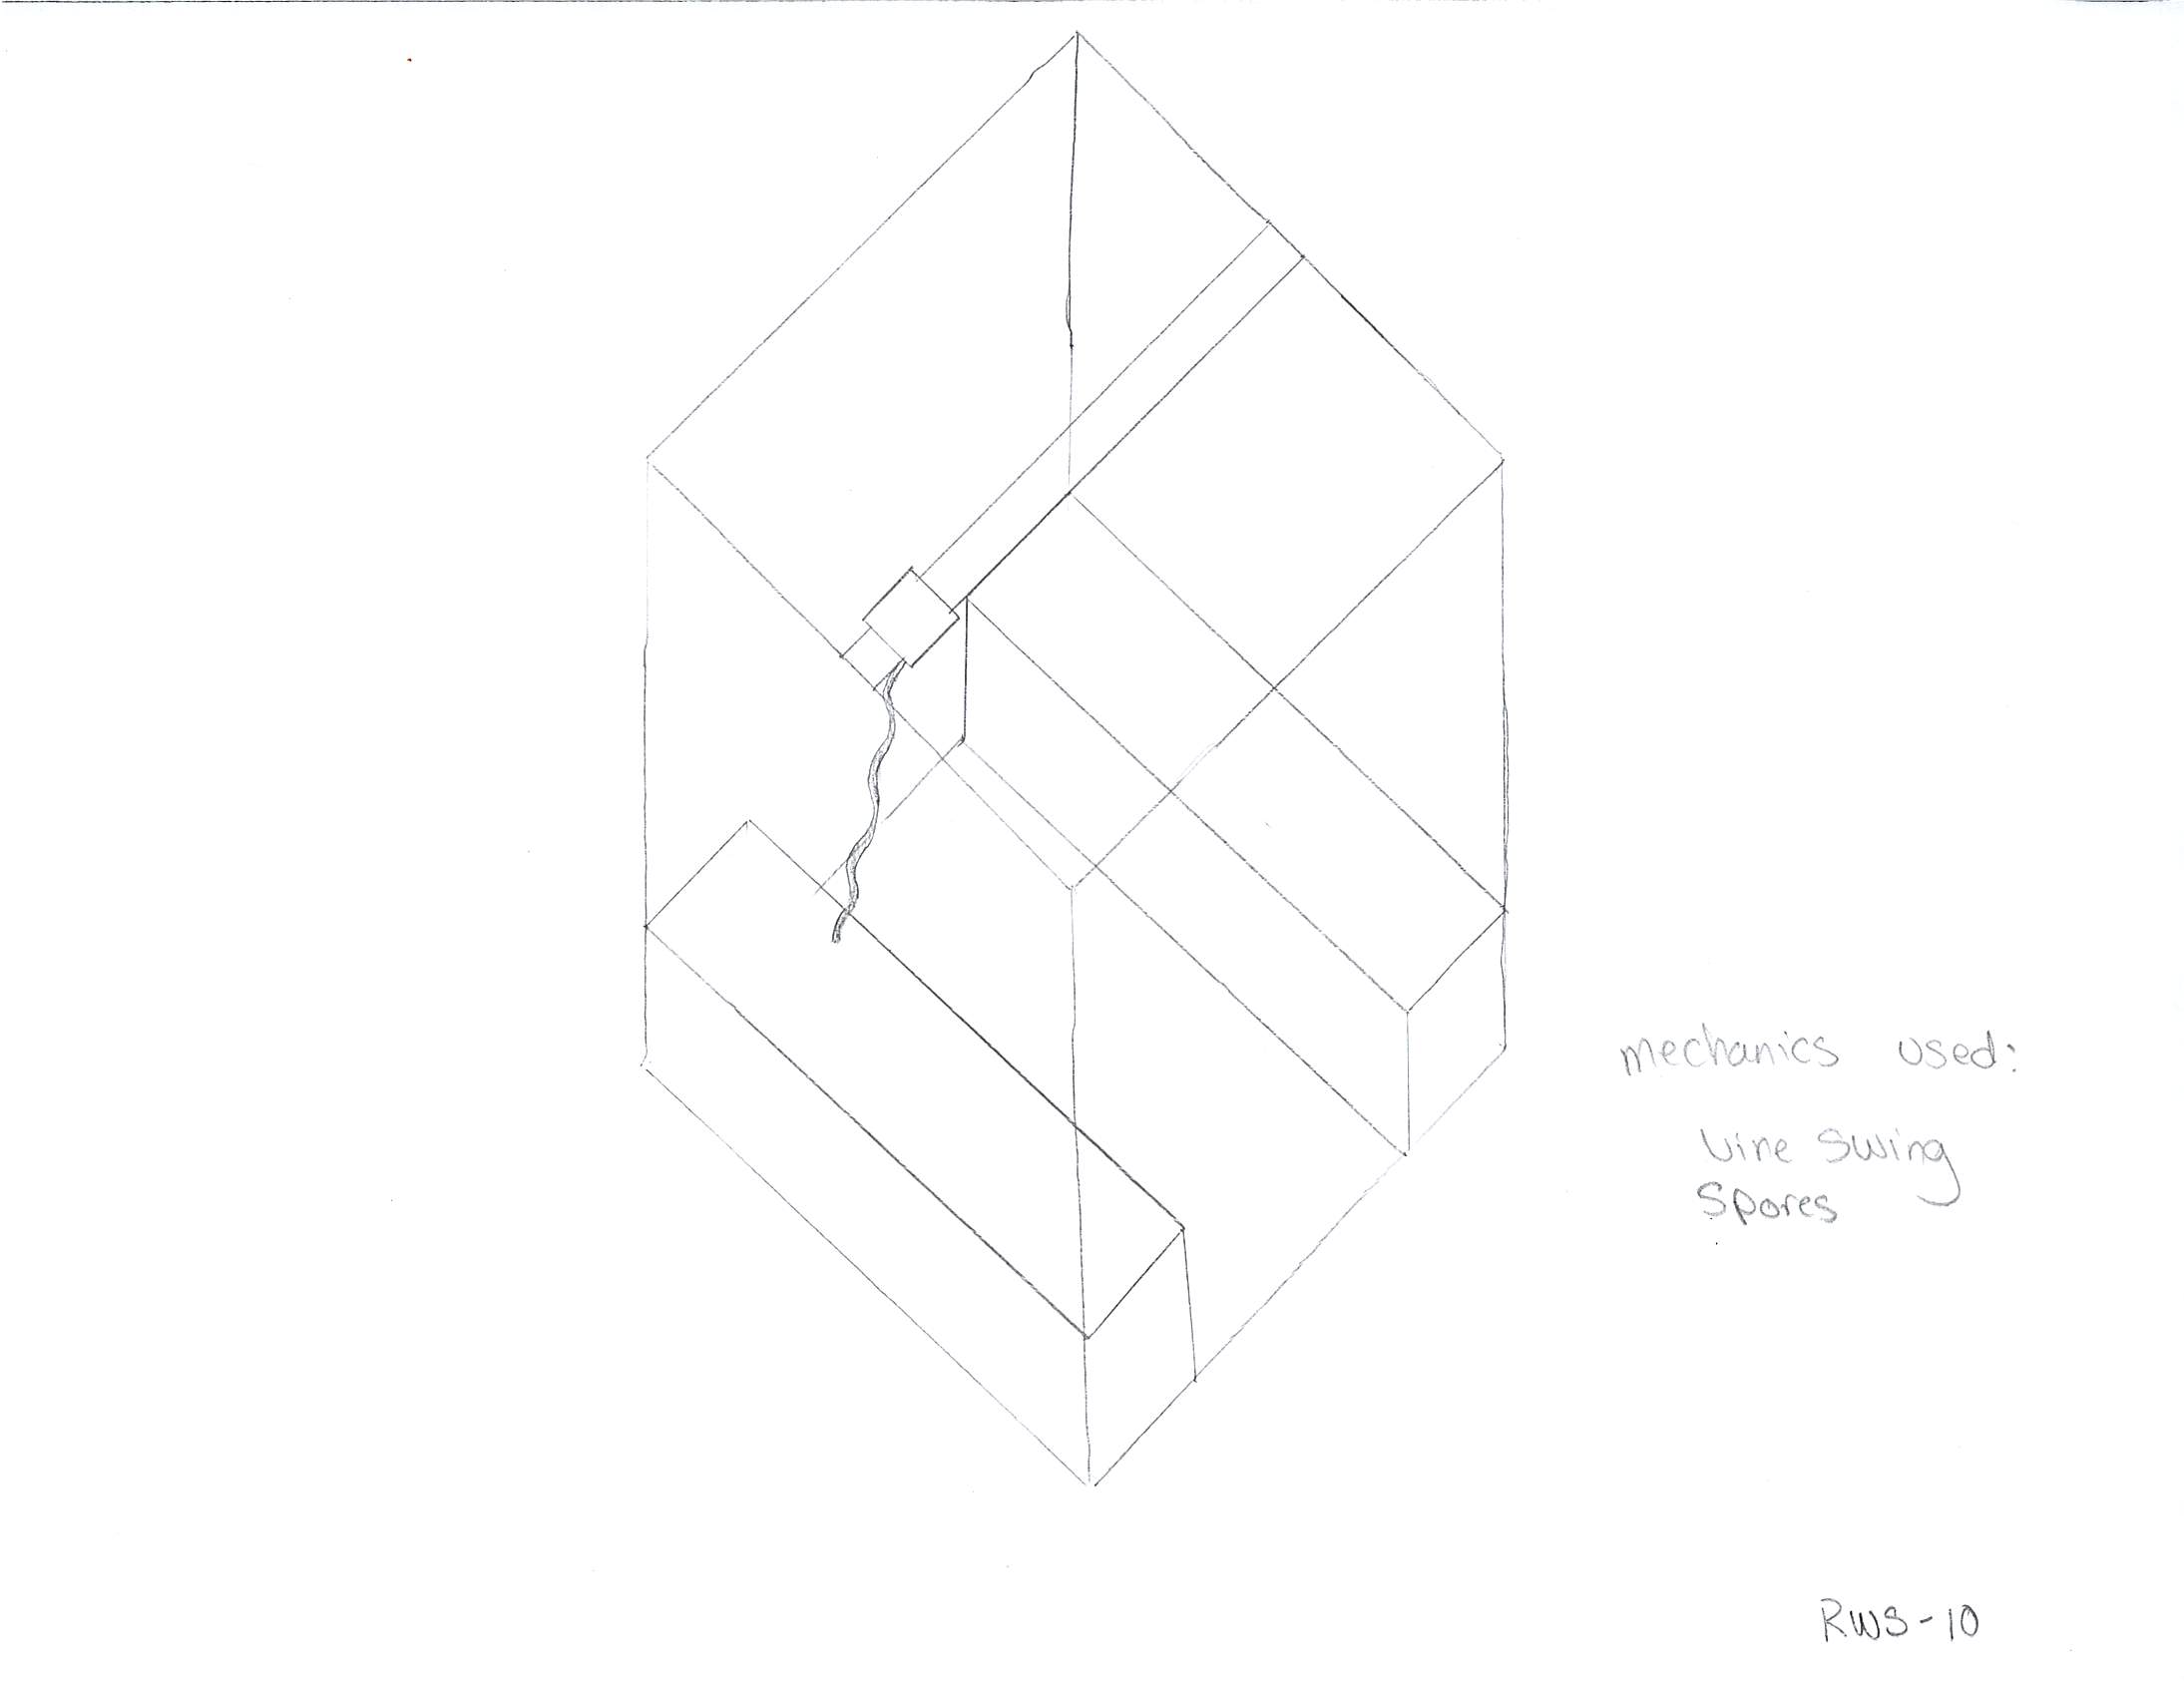

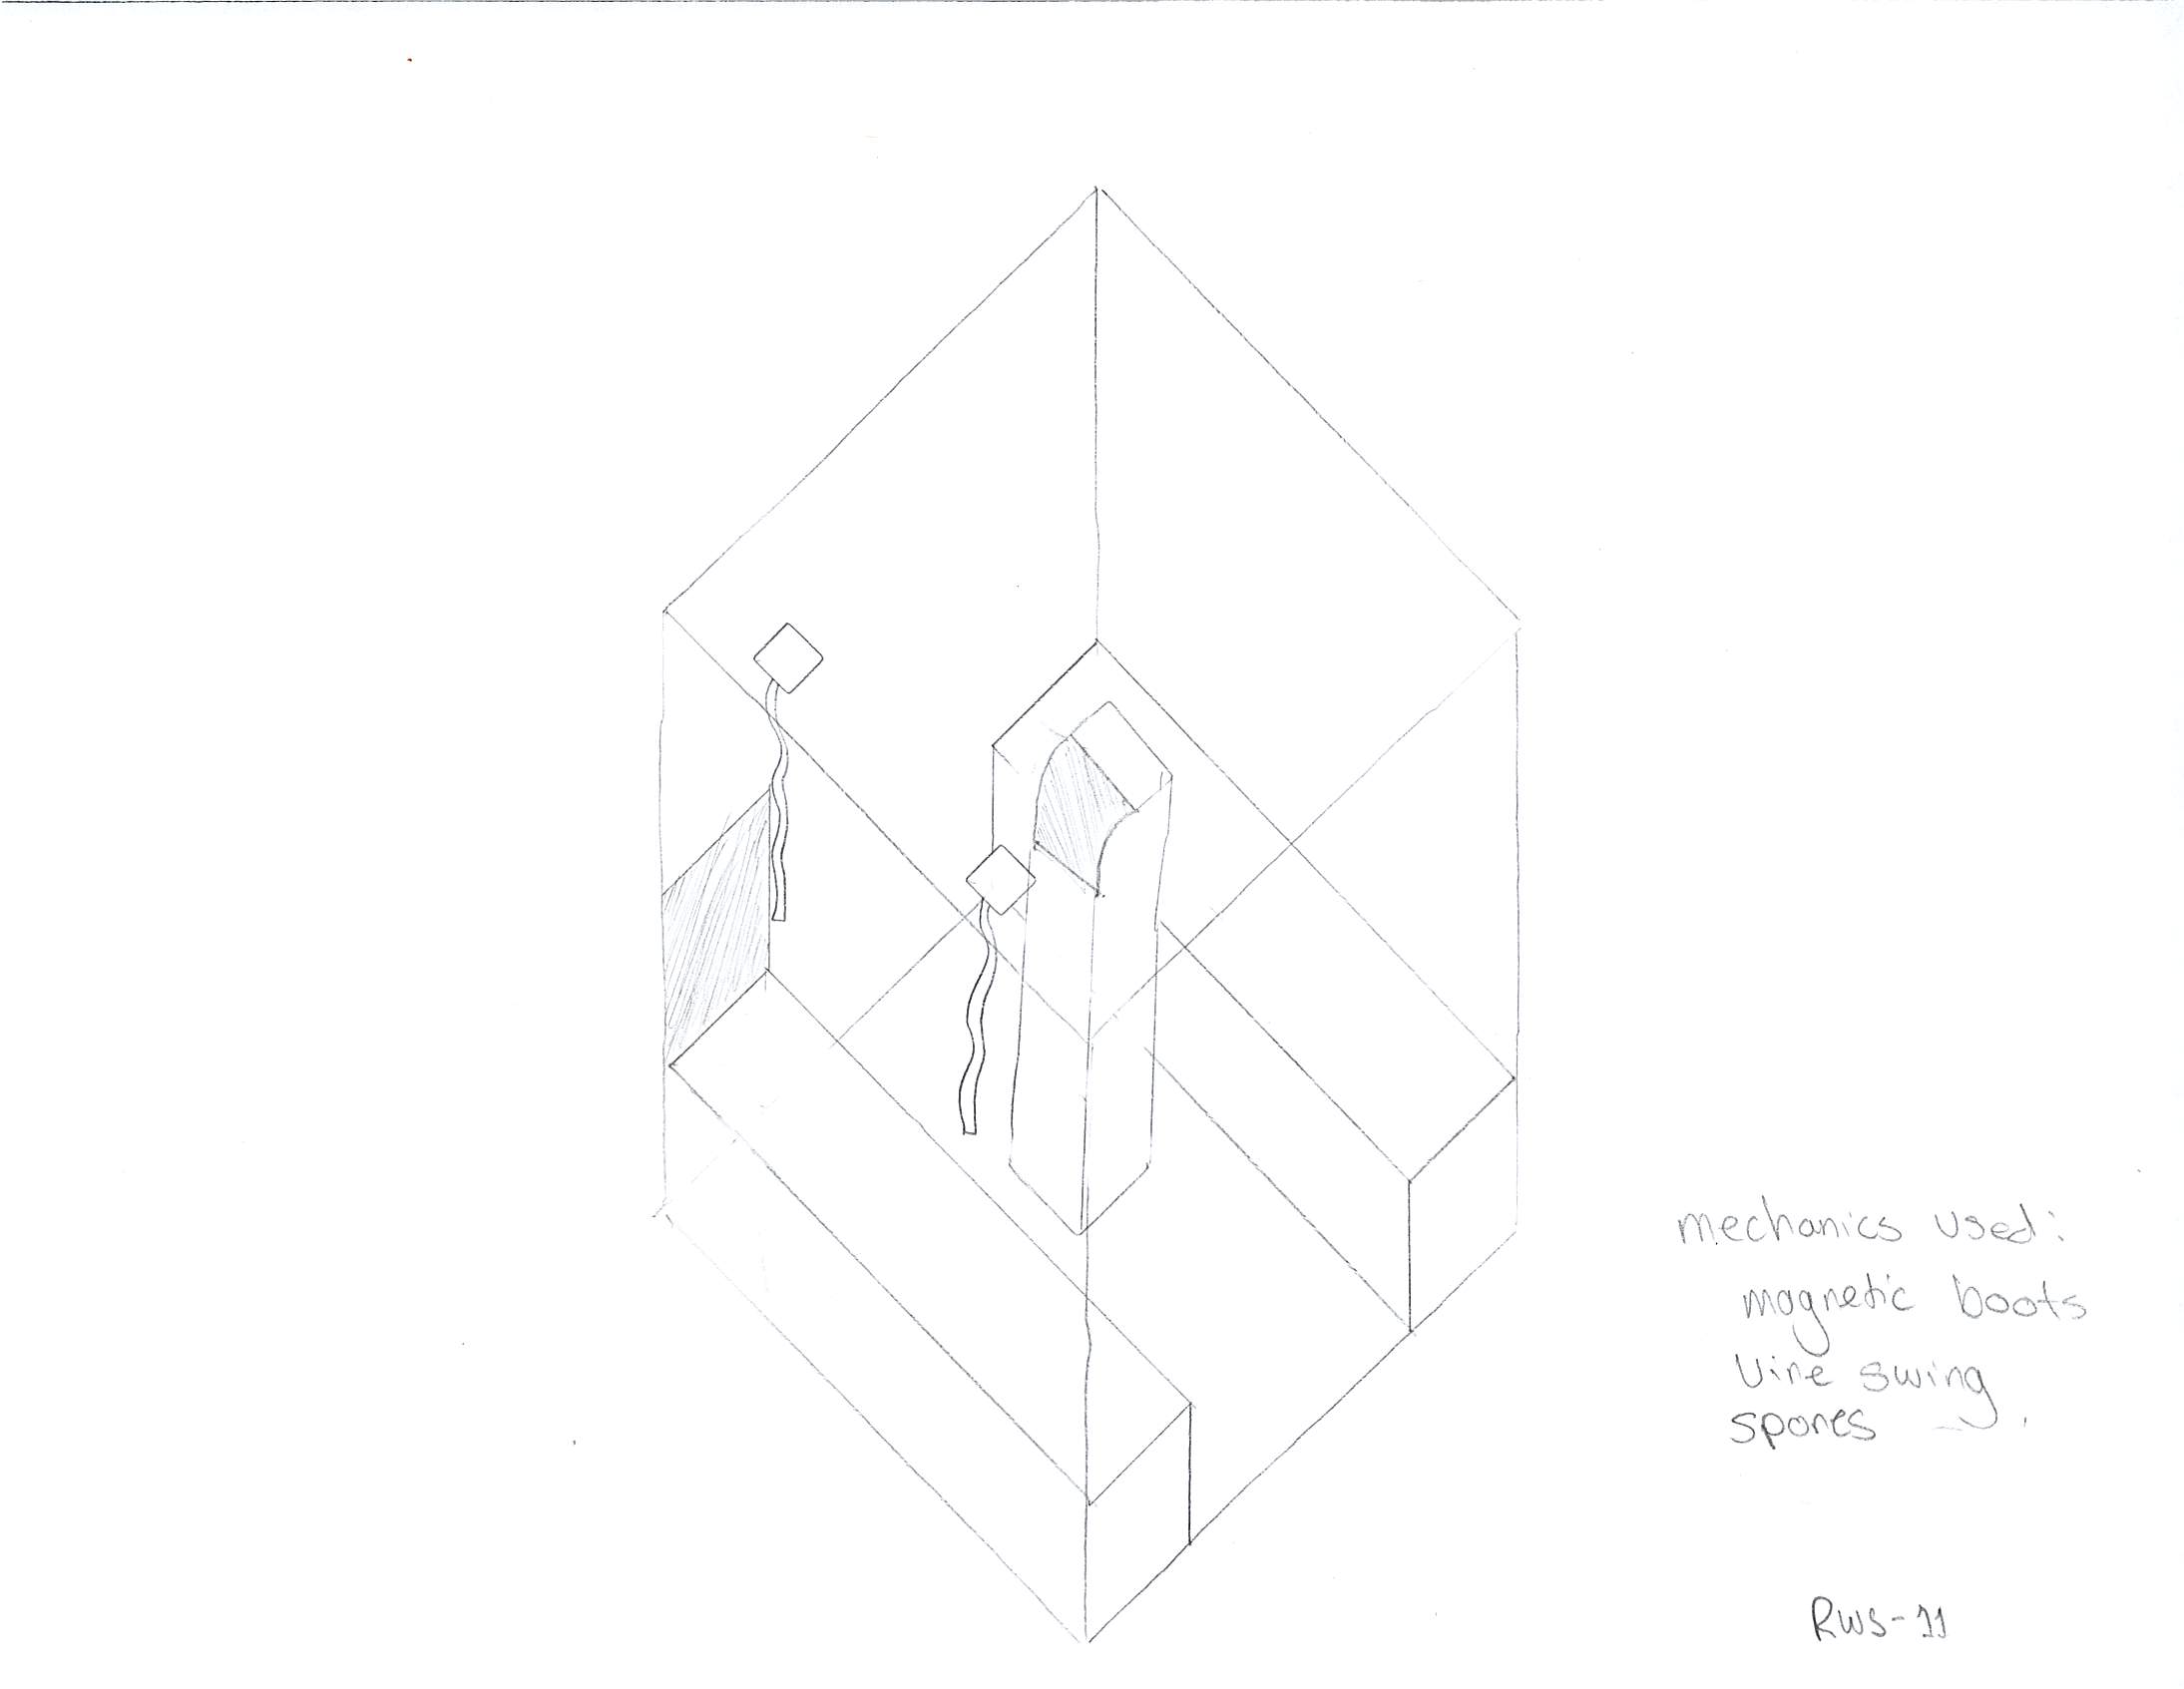

After the action blocks were sketched out on paper, it was time to implement them in the game engine. By this stage, our programmers and technical designers had developed simple initial mechanics for us to experiment with. Over the course of a week, each of the level designers translated our action blocks into the engine. Having all 32 ideas visible together allowed us to identify the enjoyable aspects of the mechanics and explore how they could be utilized in broader settings. This phase was instrumental in guiding the layout designs for each level, as you’ll see in the examples below.
Step 3: Creation of the Layout
The subsequent phase of the project involved defining the layouts for each level. For this game, it had already been established that there would be a total of three levels. We agreed that I should take the middle level. At this juncture, we were aware of two key aspects regarding the second level. Firstly, the player would possess a comprehensive understanding of the environmental mechanics within the game. Secondly, the player would acquire the magnetic gloves and magnetic boots. This provided a valuable framework for me, enabling me to introduce and instruct the player on both mechanics while also transitioning them towards the final level.
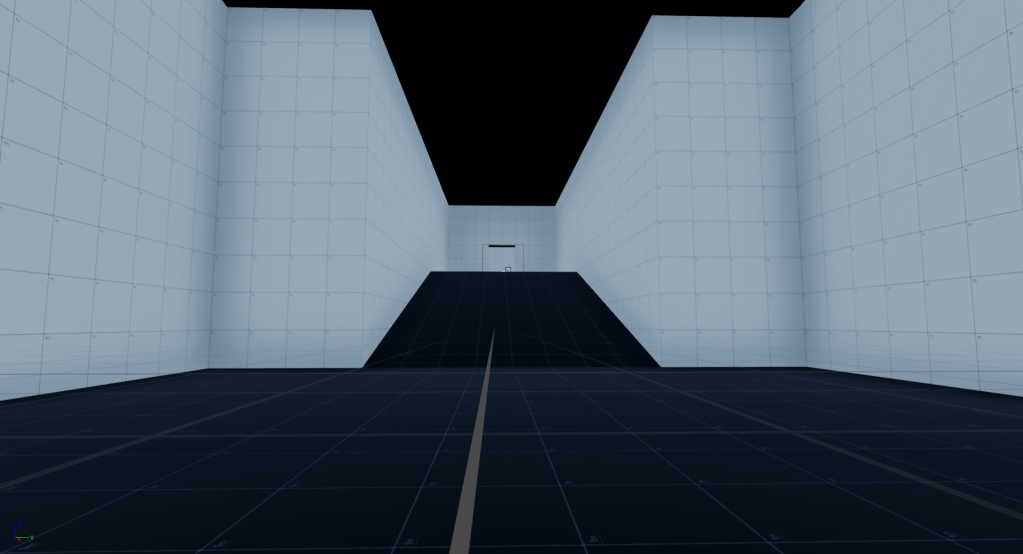
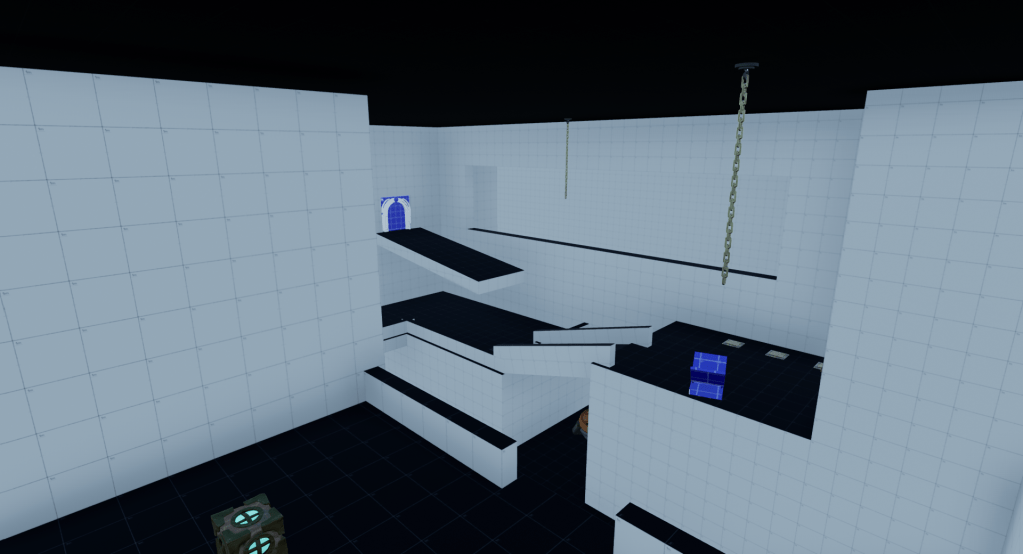
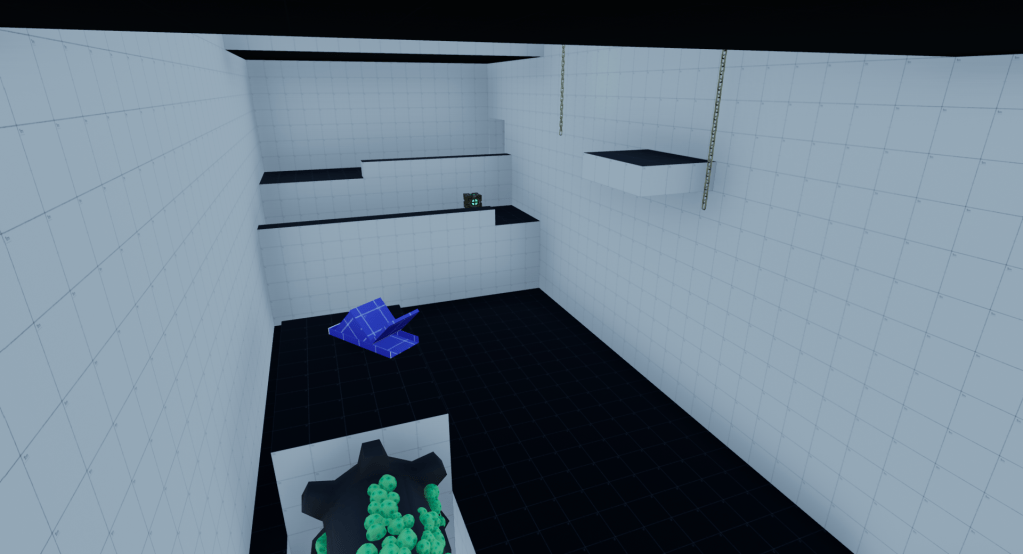
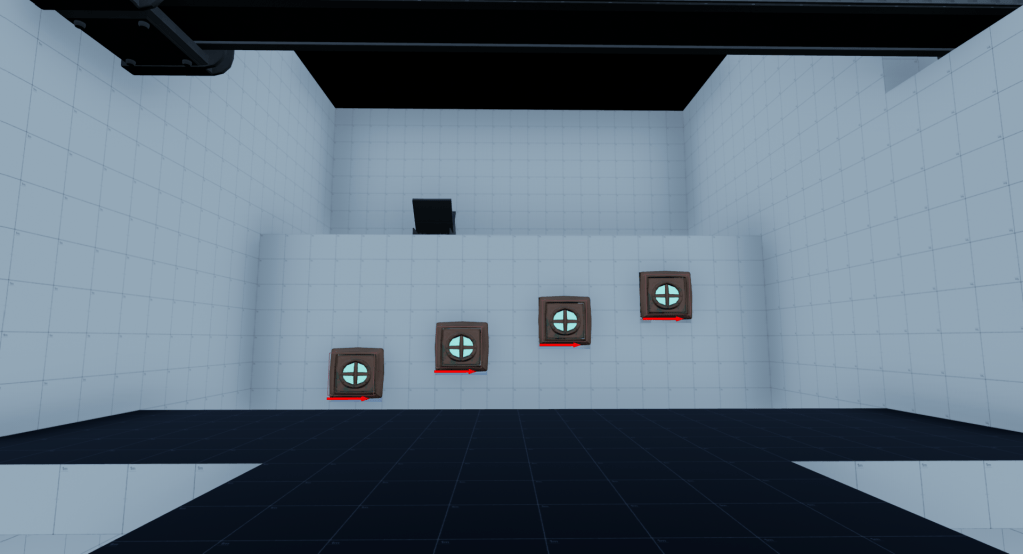
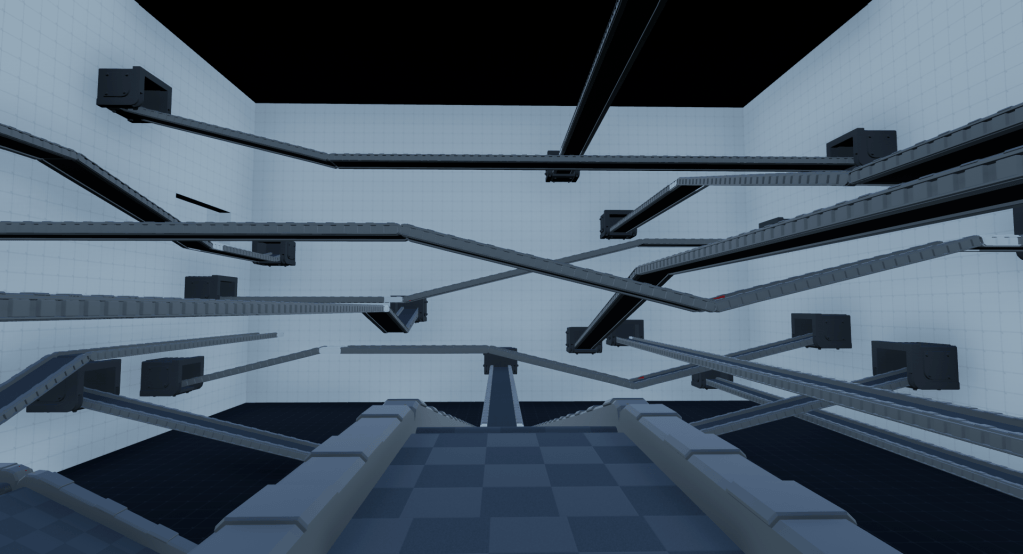
Step 4: Whiteboxing and Iterating
After the layouts were finalized, it was crucial to quickly transition to the whiteboxing phase in the game engine. This step was vital because we needed to ensure that our programmers and technical designers had ample time to make further adjustments to the mechanics. Additionally, we were aware that the art assets were still being produced. However, the artists had already provided us with proxies of all the mechanical assets by this point, simplifying the testing process significantly.
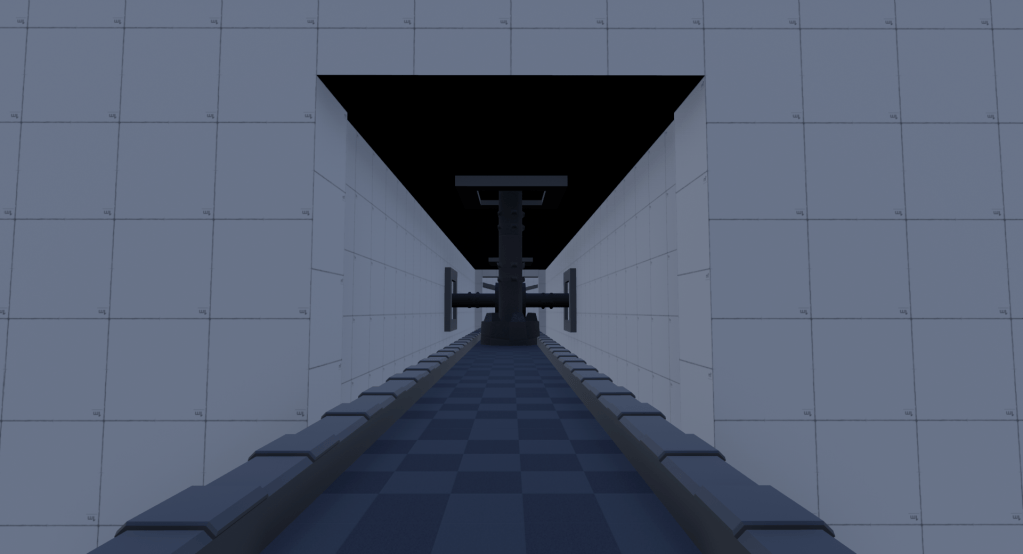
I began whiteboxing by incorporating basic elements such as walls, floors, and ceilings. Once those were in, I introduced the mechanics into the spaces. After completing this step, I revisited each space to evaluate their overall dimensions. I then started to assess which areas could be condensed slightly, both in width and height.
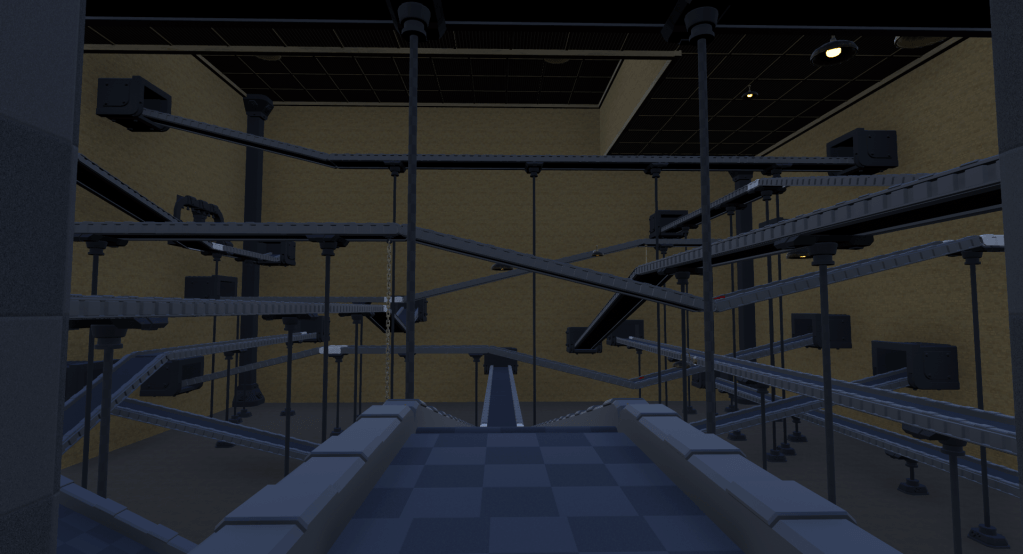
Here are some visuals depicting Level 2 during the Whiteboxing phase.


Step 5: Playtesting Session & Iterations
After completing all the levels, we arranged playtesting sessions, inviting playtesters from various backgrounds to experience our game. Prior to the sessions, we had each playtester fill out a questionnaire to collect anonymous background data. This information was valuable in understanding the gaming preferences and tendencies of each playtester.
At the beginning of each session, we instructed all players to vocalize their thoughts as they played. However, we also informed them that most questions they posed would remain unanswered. This was a deliberate decision to avoid providing hints or solutions to puzzles, ensuring that players could fully engage with the game’s challenges independently.
Following the conclusion of the playtesting, we requested that each player complete a post-session questionnaire. The questionnaire included inquiries such as “Is there anything you still feel unsure about, even after completing the game?” Additionally, we analyzed the live footage of these individuals playing our game. This combined feedback provided valuable insights into what aspects we should proceed with, which required further iteration, and what needed to be eliminated.
Of the initial 13 rooms in Level 2, three were cut.
- Room 1 served as the starting point for the level, and also the new magnetic glove mechanic. However, players found the moving magnetic object to be too much for a first interaction with the new mechanic. Because of this, I broke Room 3 into two different rooms. One of which was a small room that more easily teaches the player the new mechanic, and one of which test the players understanding of the new mechanic.
- Room 2 was found to be interesting in theory, but overall tedious to the player. We assumed this information heading into the playtesting session, but we still wanted to see an outside perspective of the room. After the playtesting session, this room was cut.
- Room 12 was also cut. This one wasn’t necessarily a room the players found uninteresting, rather we decided to cut this room due to the potential of over scoping. The player wasn’t learning anything new in this space, and the spaces as a whole somewhat interrupted the overall flow of the level.
As mentioned earlier, several rooms underwent iteration. Some players had noted that certain mechanics in Level 1, like breakable platforms and the overall use of death boxes, could have been incorporated more in Level 2. Consequently, I made adjustments to the spaces to incorporate more mechanics from Level 1, without adversely affecting the level’s flow.
One of the key metrics we monitored during the sessions was the frequency and location of player deaths. We observed that players died approximately 40 times in the second level. This figure was higher than desired, prompting adjustments to areas where deaths occurred excessively. Specifically, we modified the total number of spores on the rotating cylinders and adjusted their collision boxes. These changes helped decrease the likelihood of death without completely eliminating the functionality.
Step 6: Adding Basic Architecture
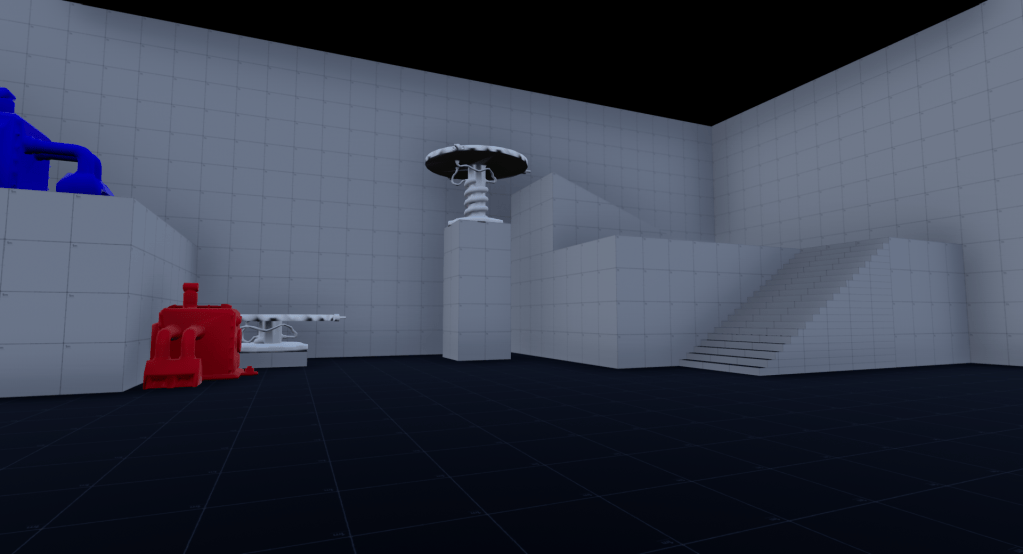
After completing the whiteboxing phase, my aim was to entirely remove all whitebox elements from the game, although the layer itself remained saved for potential future needs. Following a similar approach to whiteboxing, I began by adding architectural elements such as walls, floors, and ceilings. Once these foundational pieces were in place, I dedicated time to incorporating more detailed elements like columns, beams, floor hides, and corner hides. Additionally, I utilized this step to further adjust some walls and ceilings to condense the spaces. A concern related to scope at this stage was the time required for lighting each of the levels. It was crucial to save as much time as possible, which necessitated further reductions in the size of the spaces.
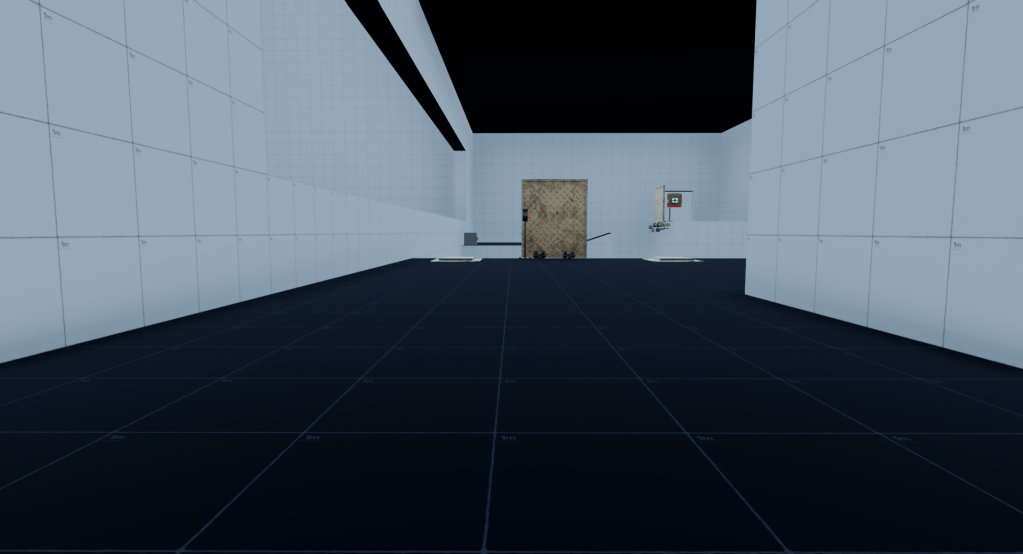
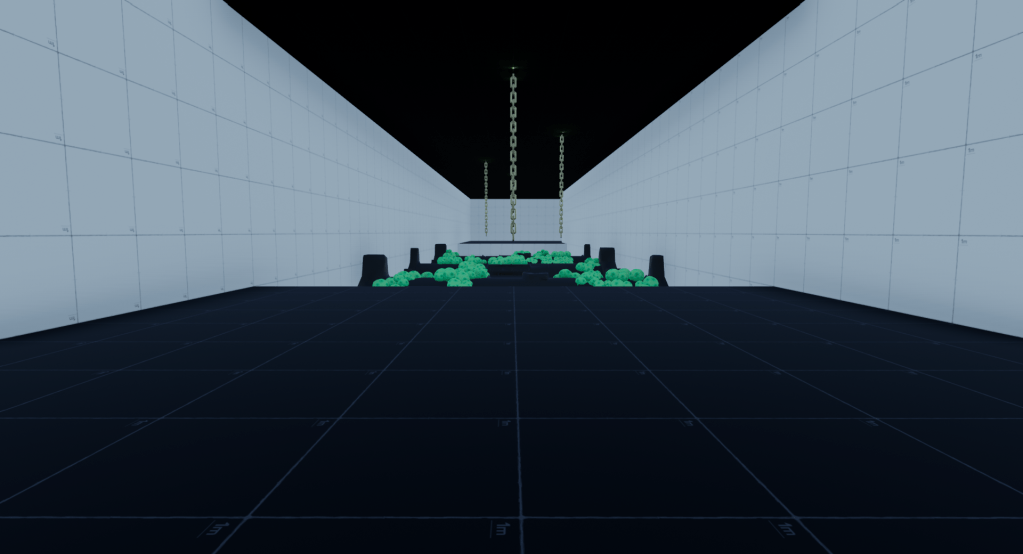
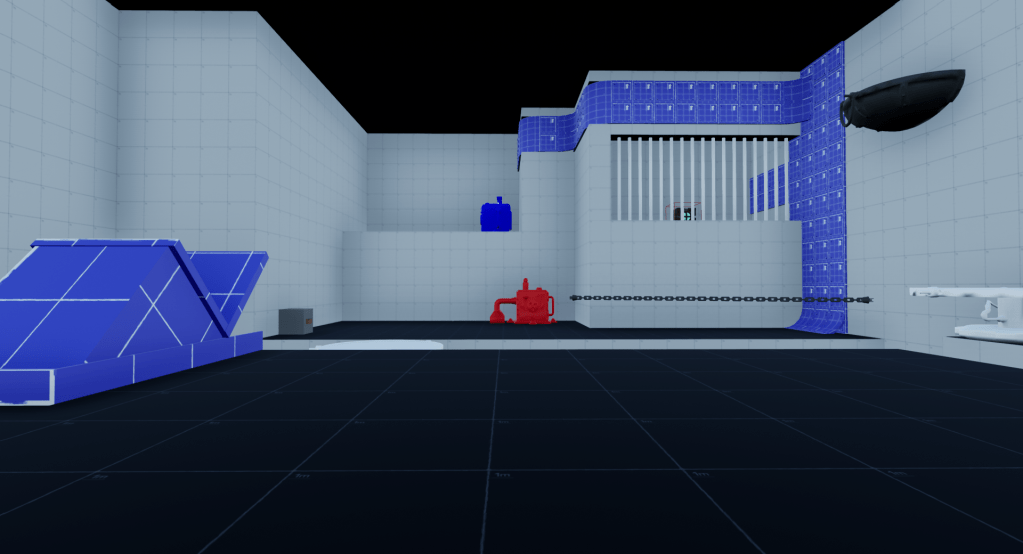
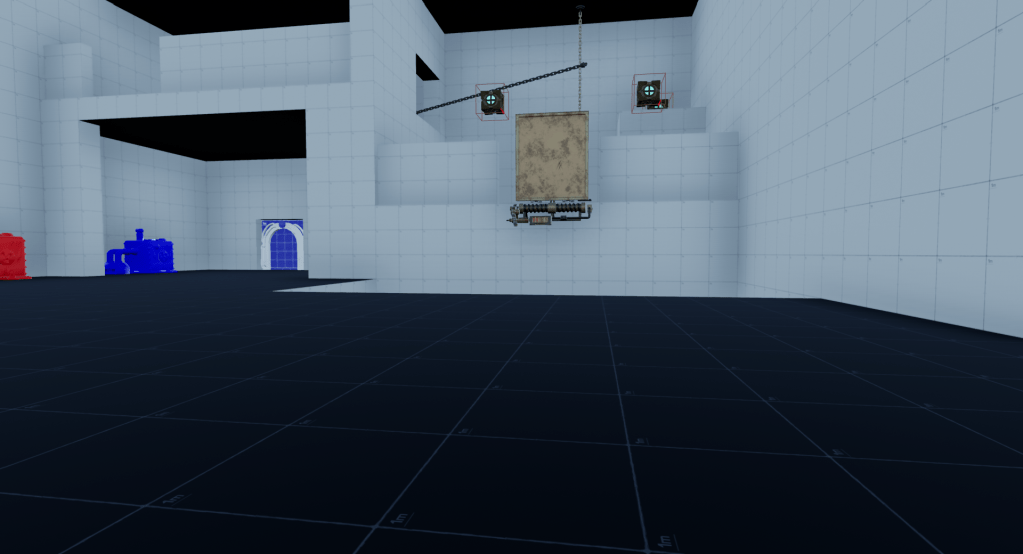
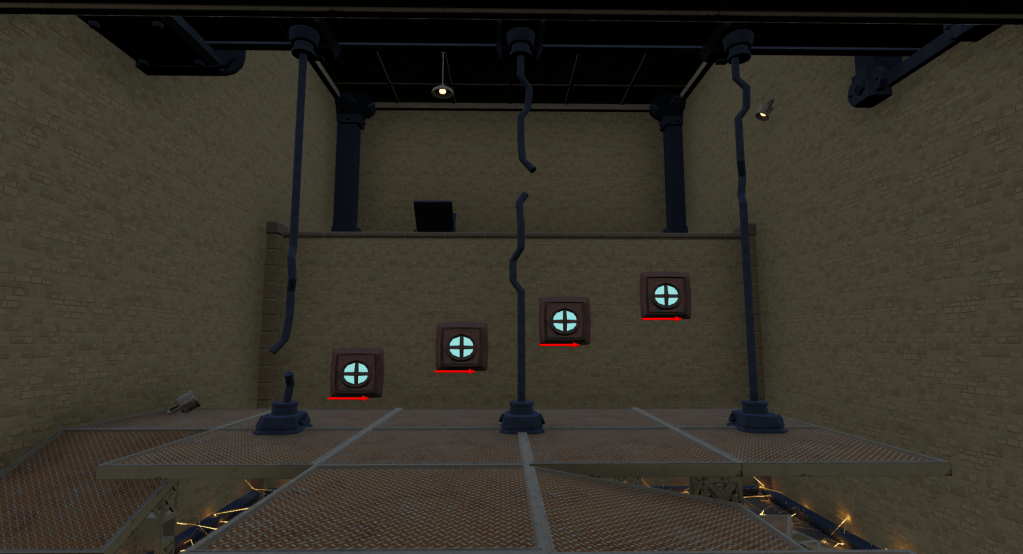
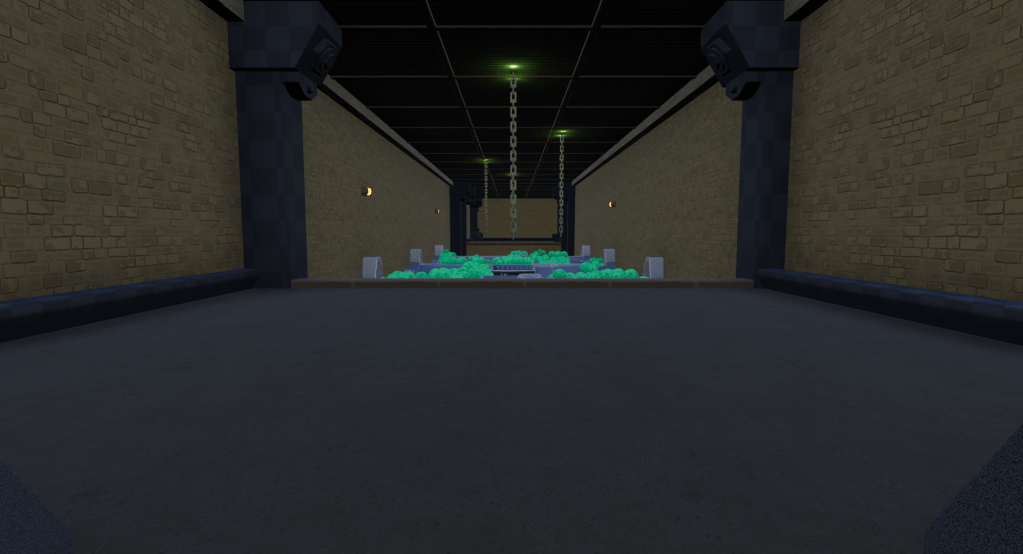
Below are images of each of the rooms within Level 2. It’s important to note that, at that stage of the project, no lighting progress had been made in the level, and some of the architectural features had yet to be textured by the art team.


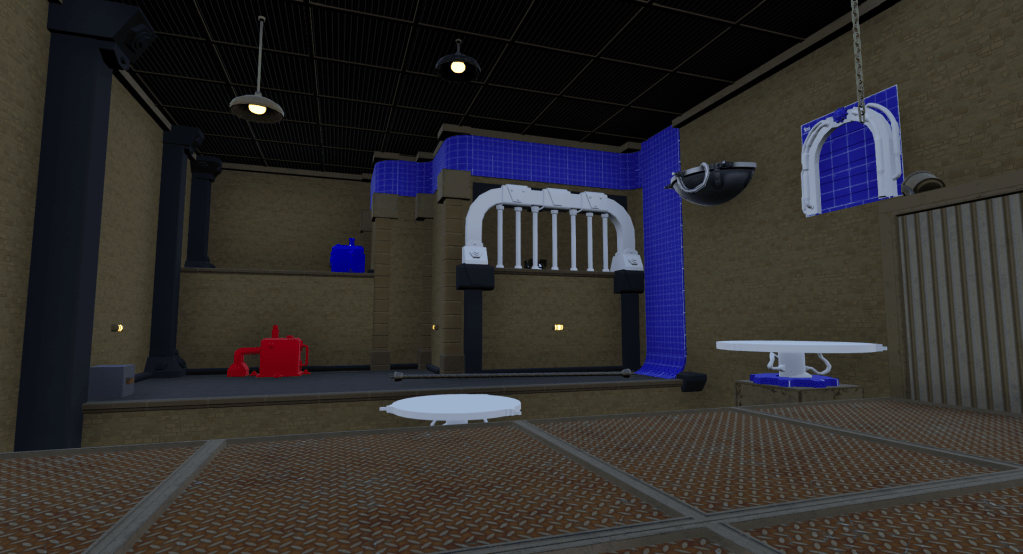
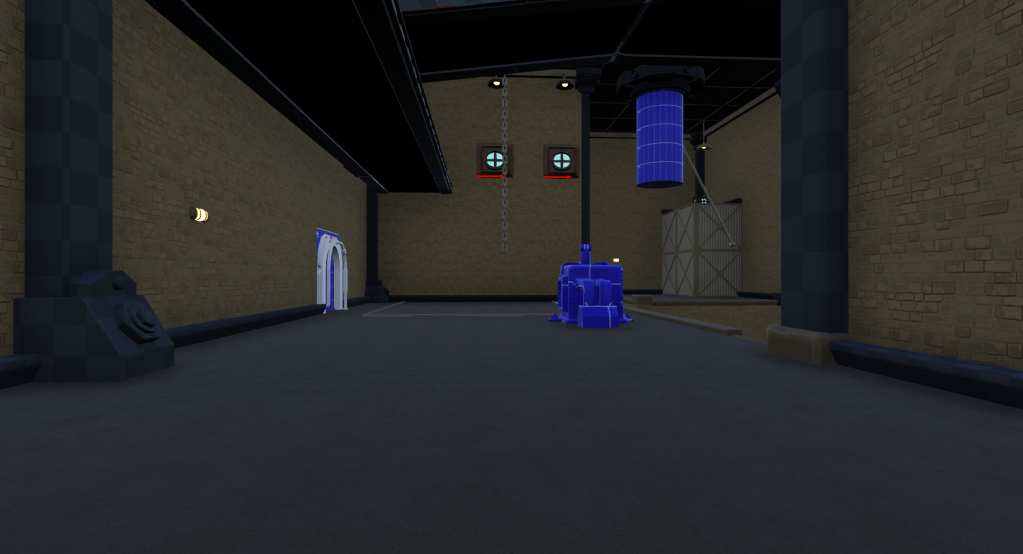
Below is a comparison of a single space before and after the architecture was added.


Step 7: Set Dressing
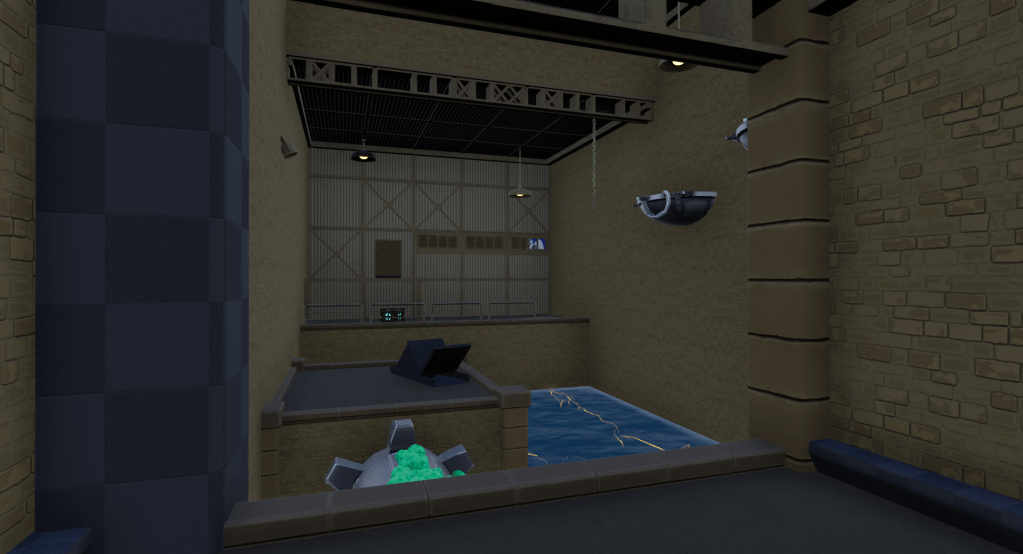
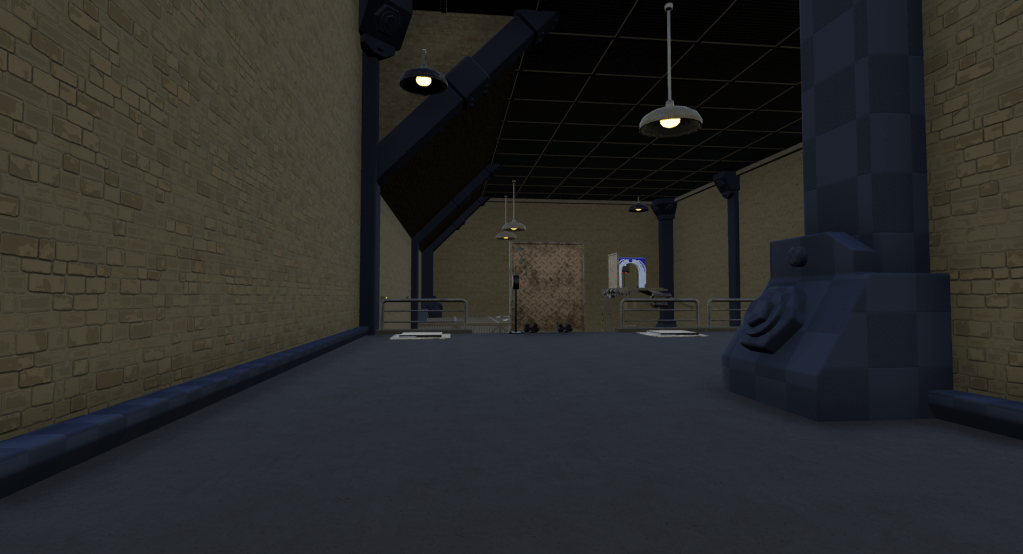
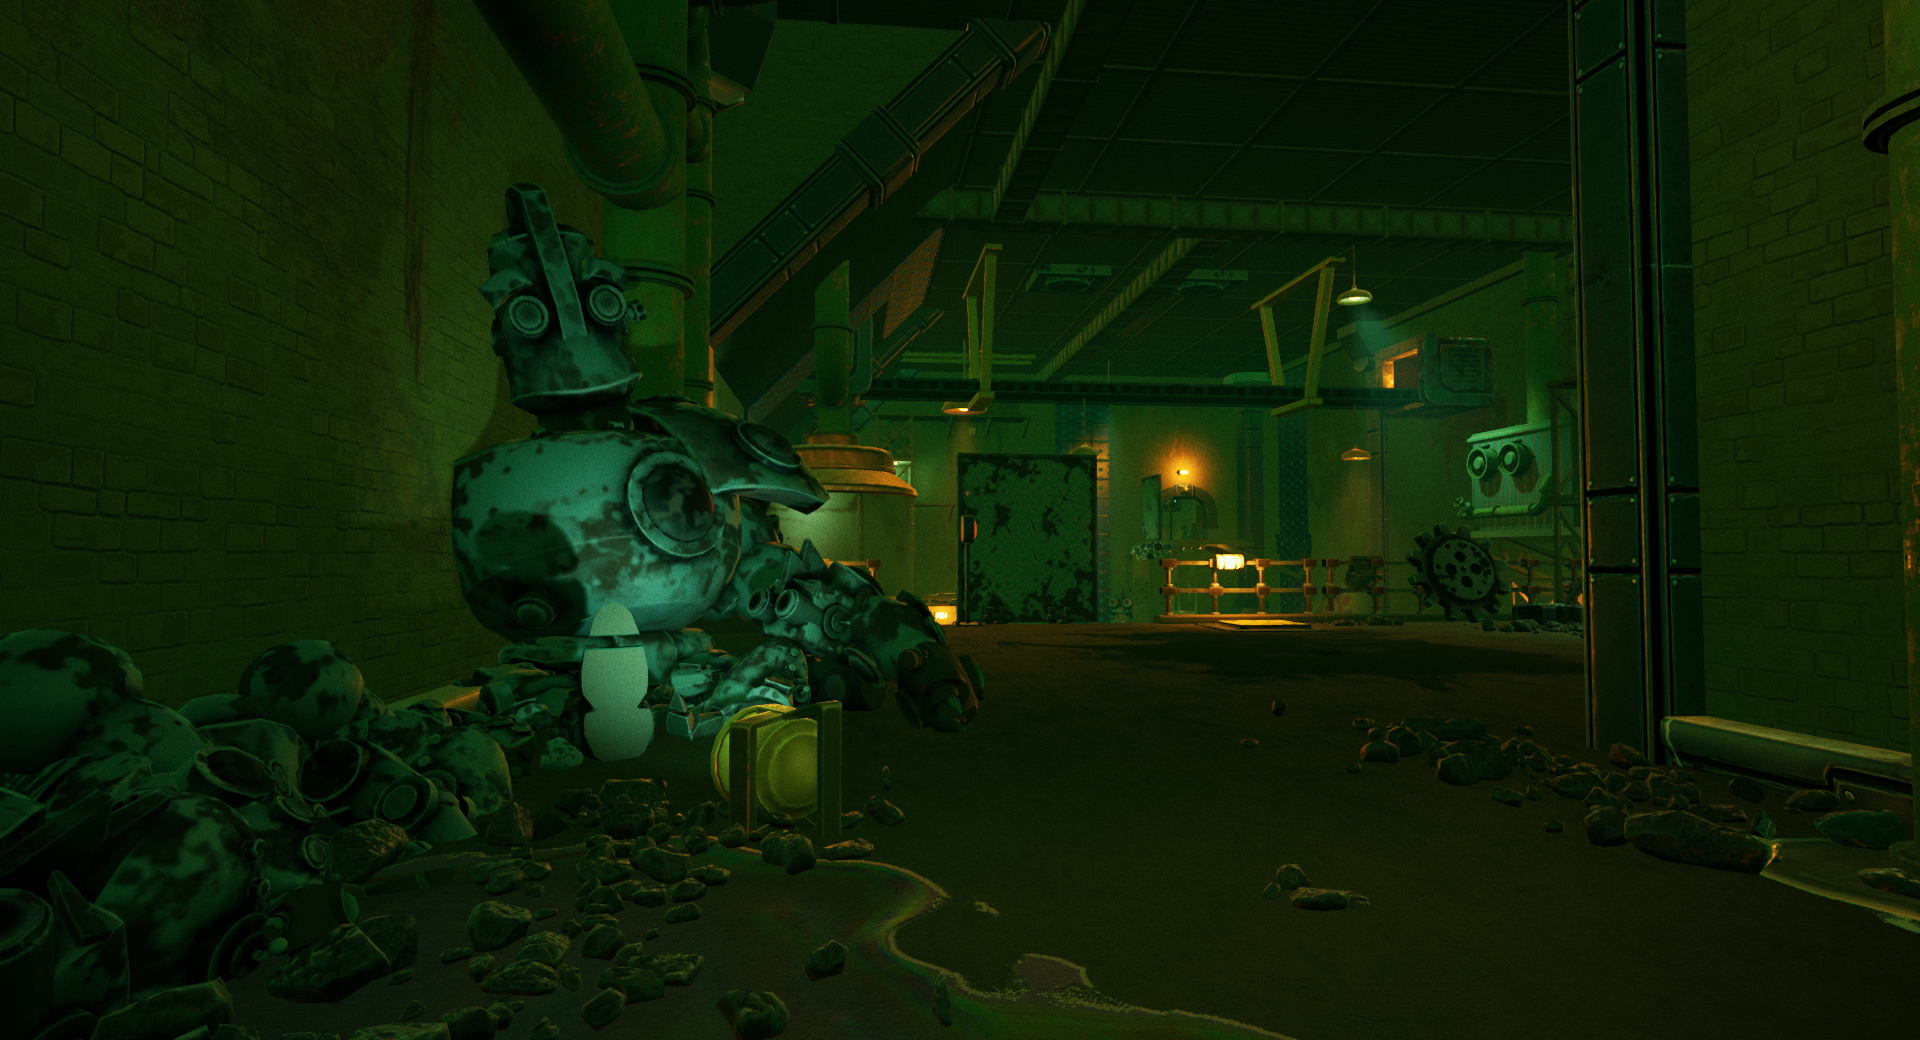
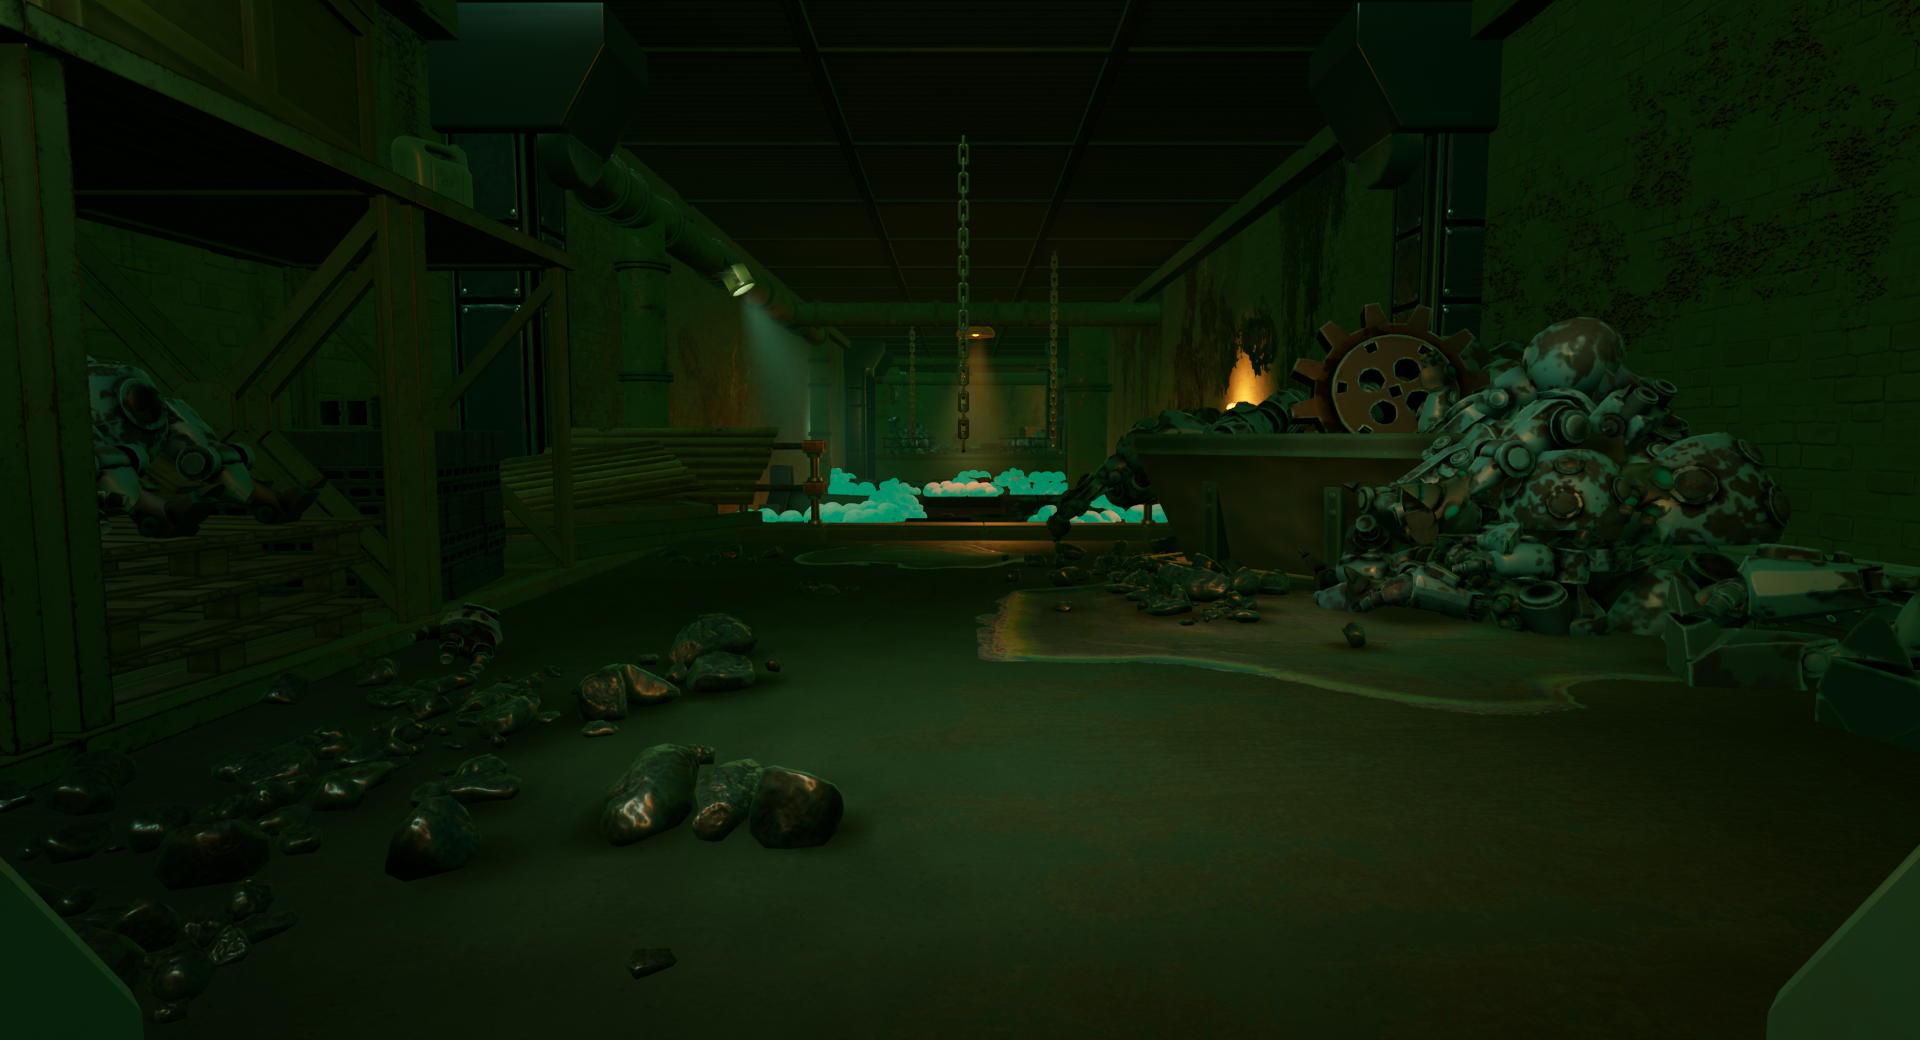
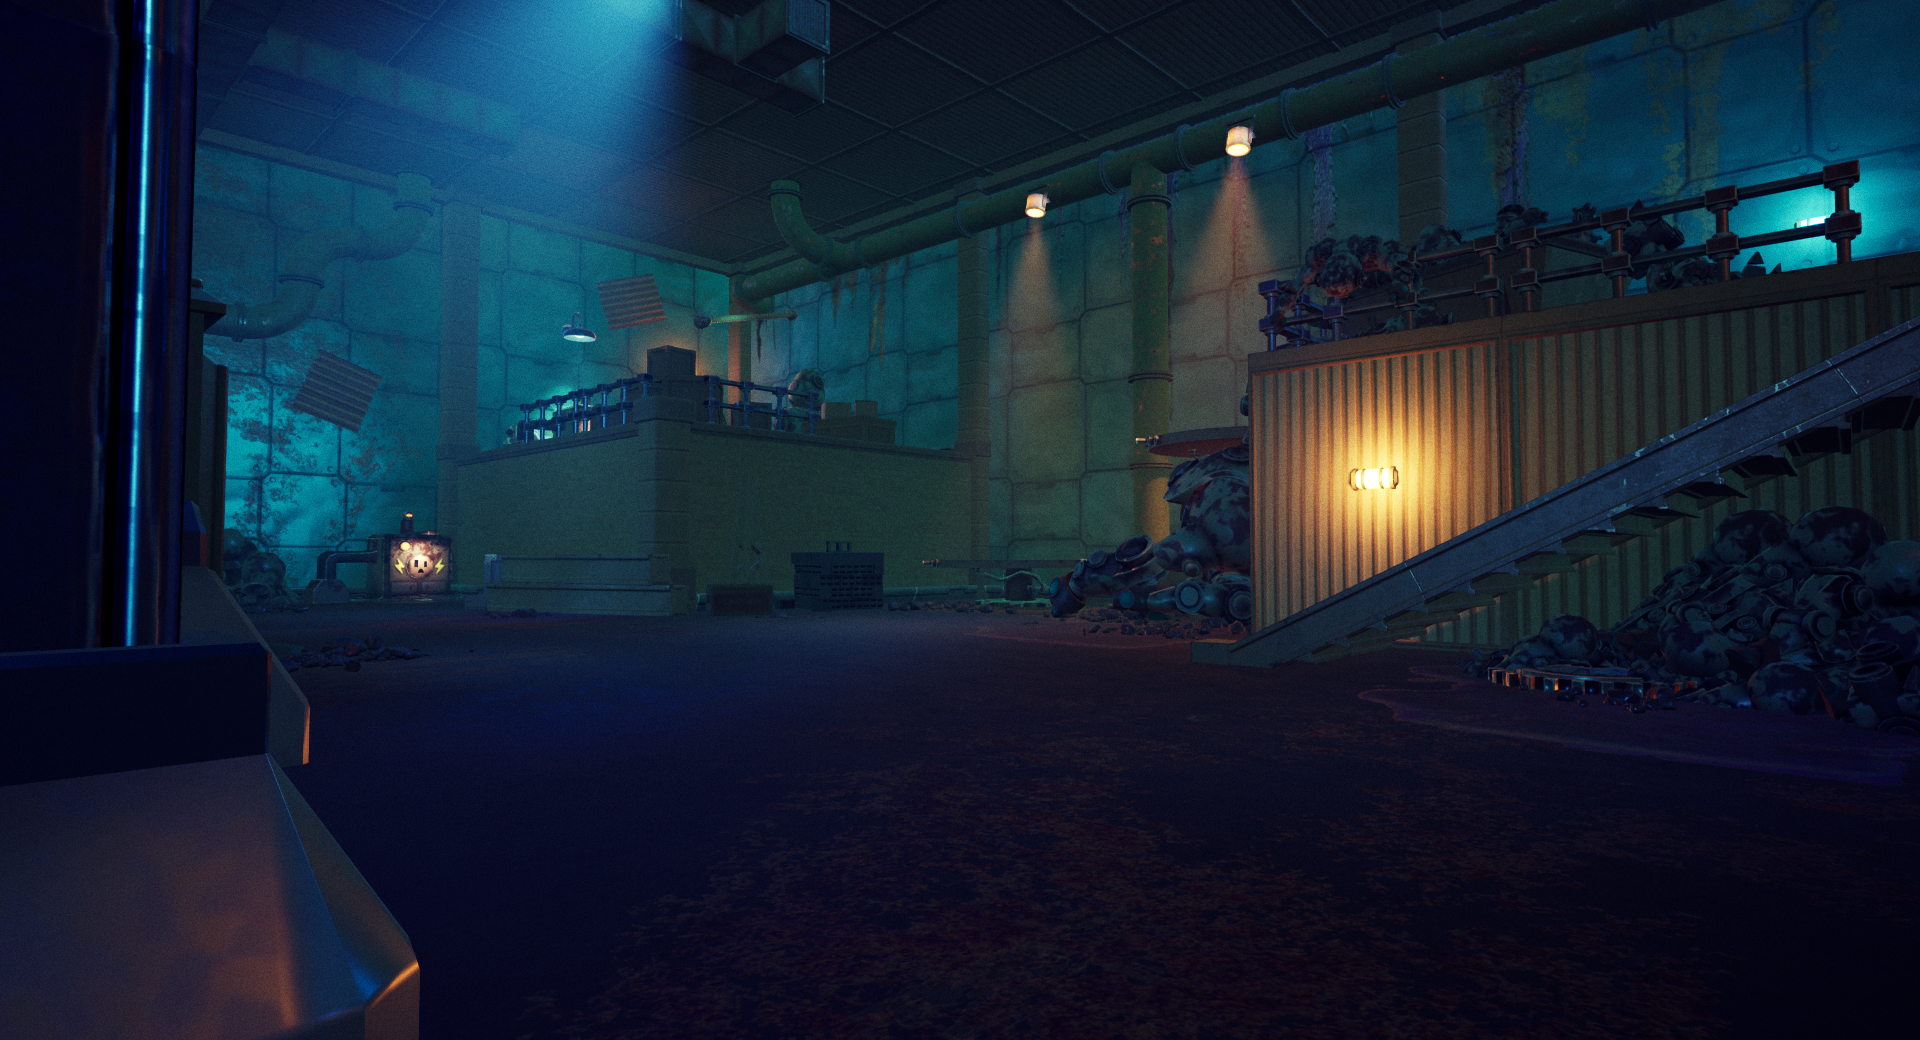
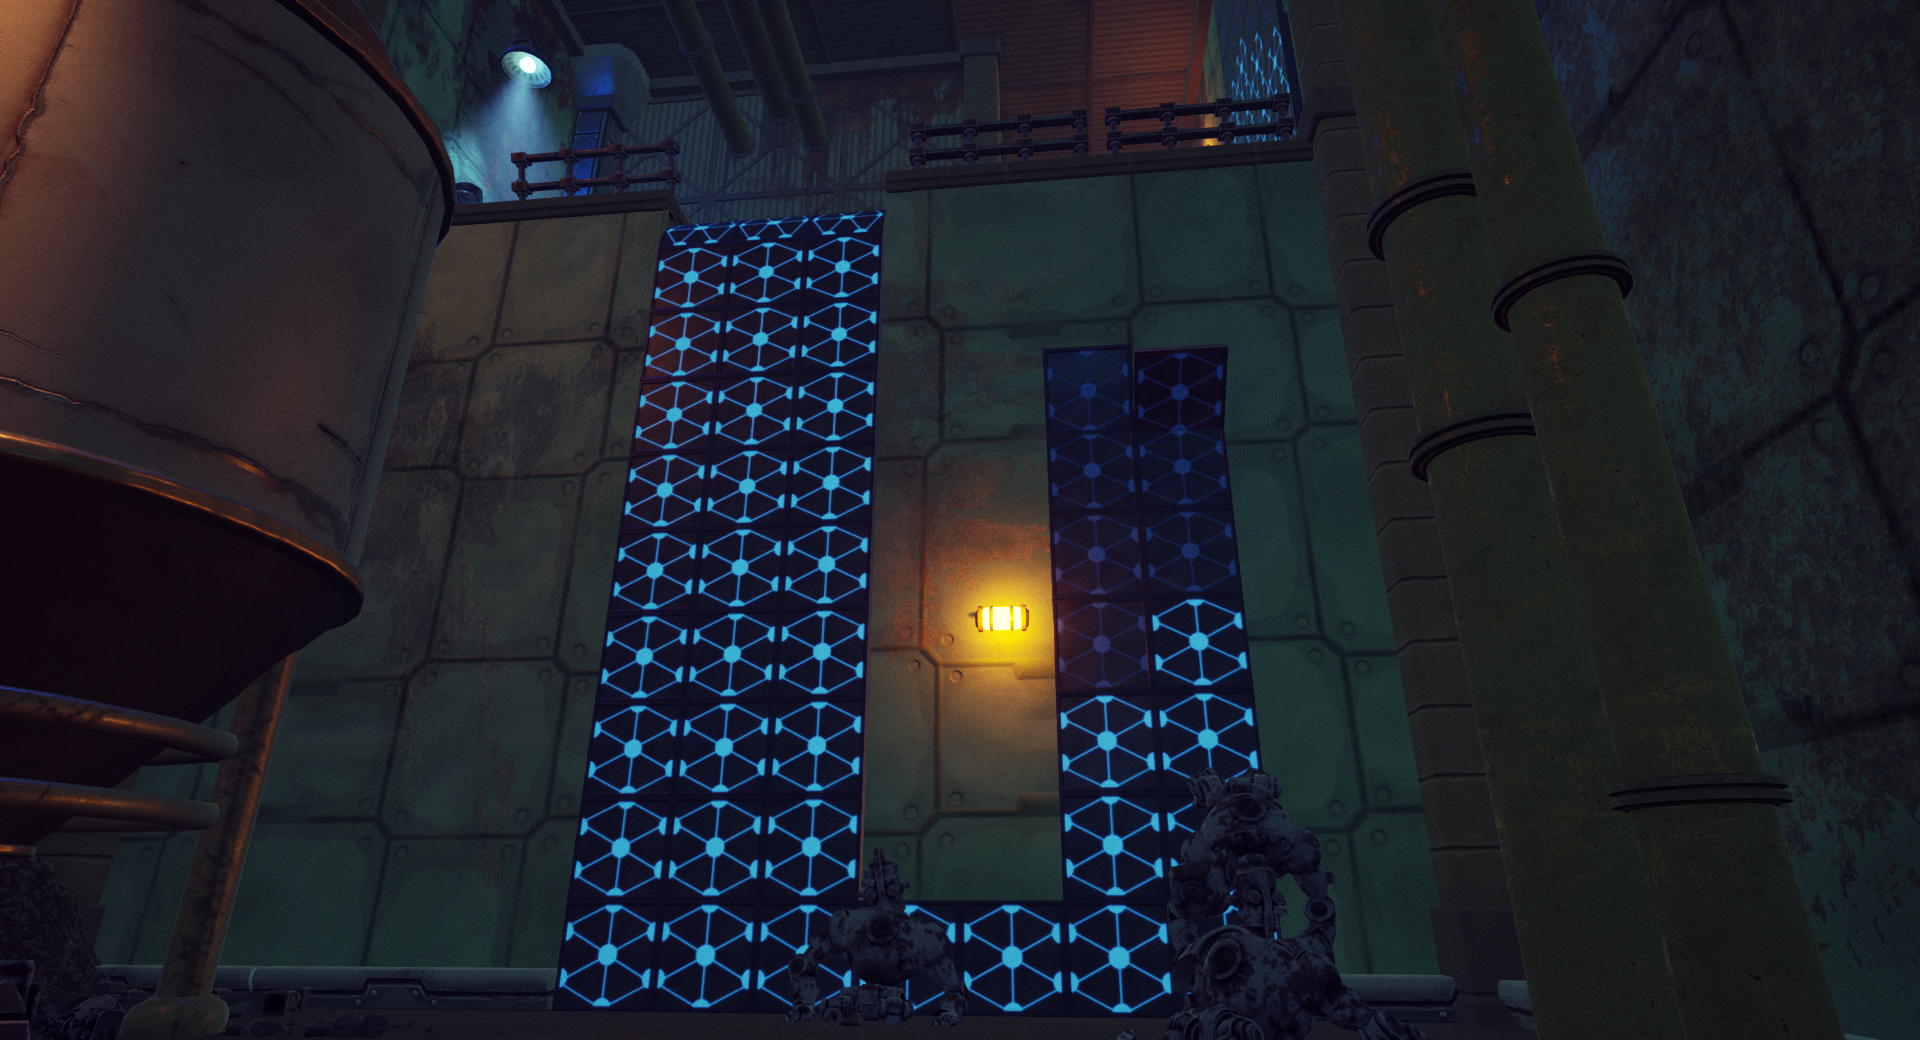
I spent around two months set dressing this level. First, I added more stuff like railings, big containers, and furnaces. Then, I put in lots of pipes to break up the walls and give players new places to jump around. Our character artist made some new robots with different parts, so I made piles of broken robots and posed others in different spots. While doing that, I also filled shelves with stuff to make each area look different. Towards the end, I added stickers on walls and floors to make them look more worn out and break up the walls even more.
The entire time I was working on set dressing, our Lighting Artist was spending time in all of the levels, improving the lighting weekly. I determined the location of about 90% of the lights in this level, but our Lighting Artist had full control of the colors of the lights, the post process, etc. I did ask her to make the transition from the green lighting to the blue lighting as the player was falling in the middle of the level. I also worked closely with her as she was working on the lighting, making sure we were both on the same page the entire way through.
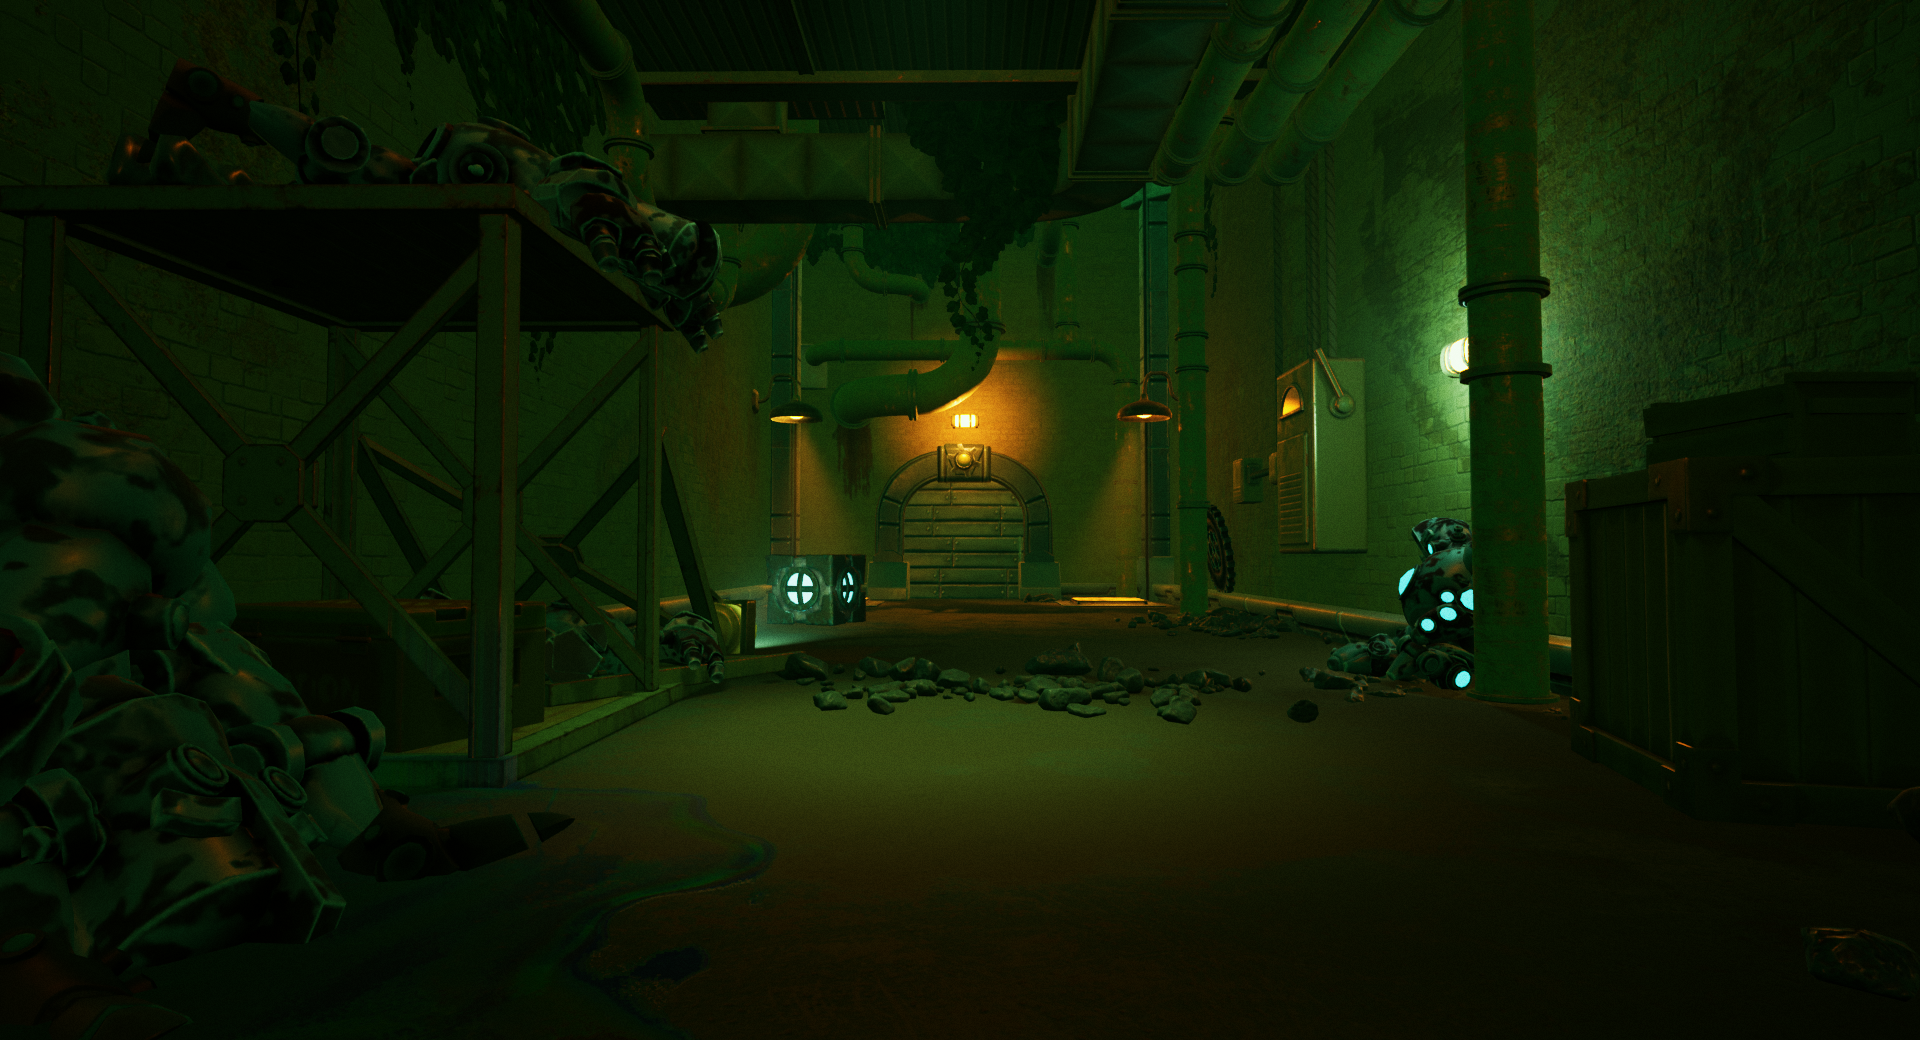
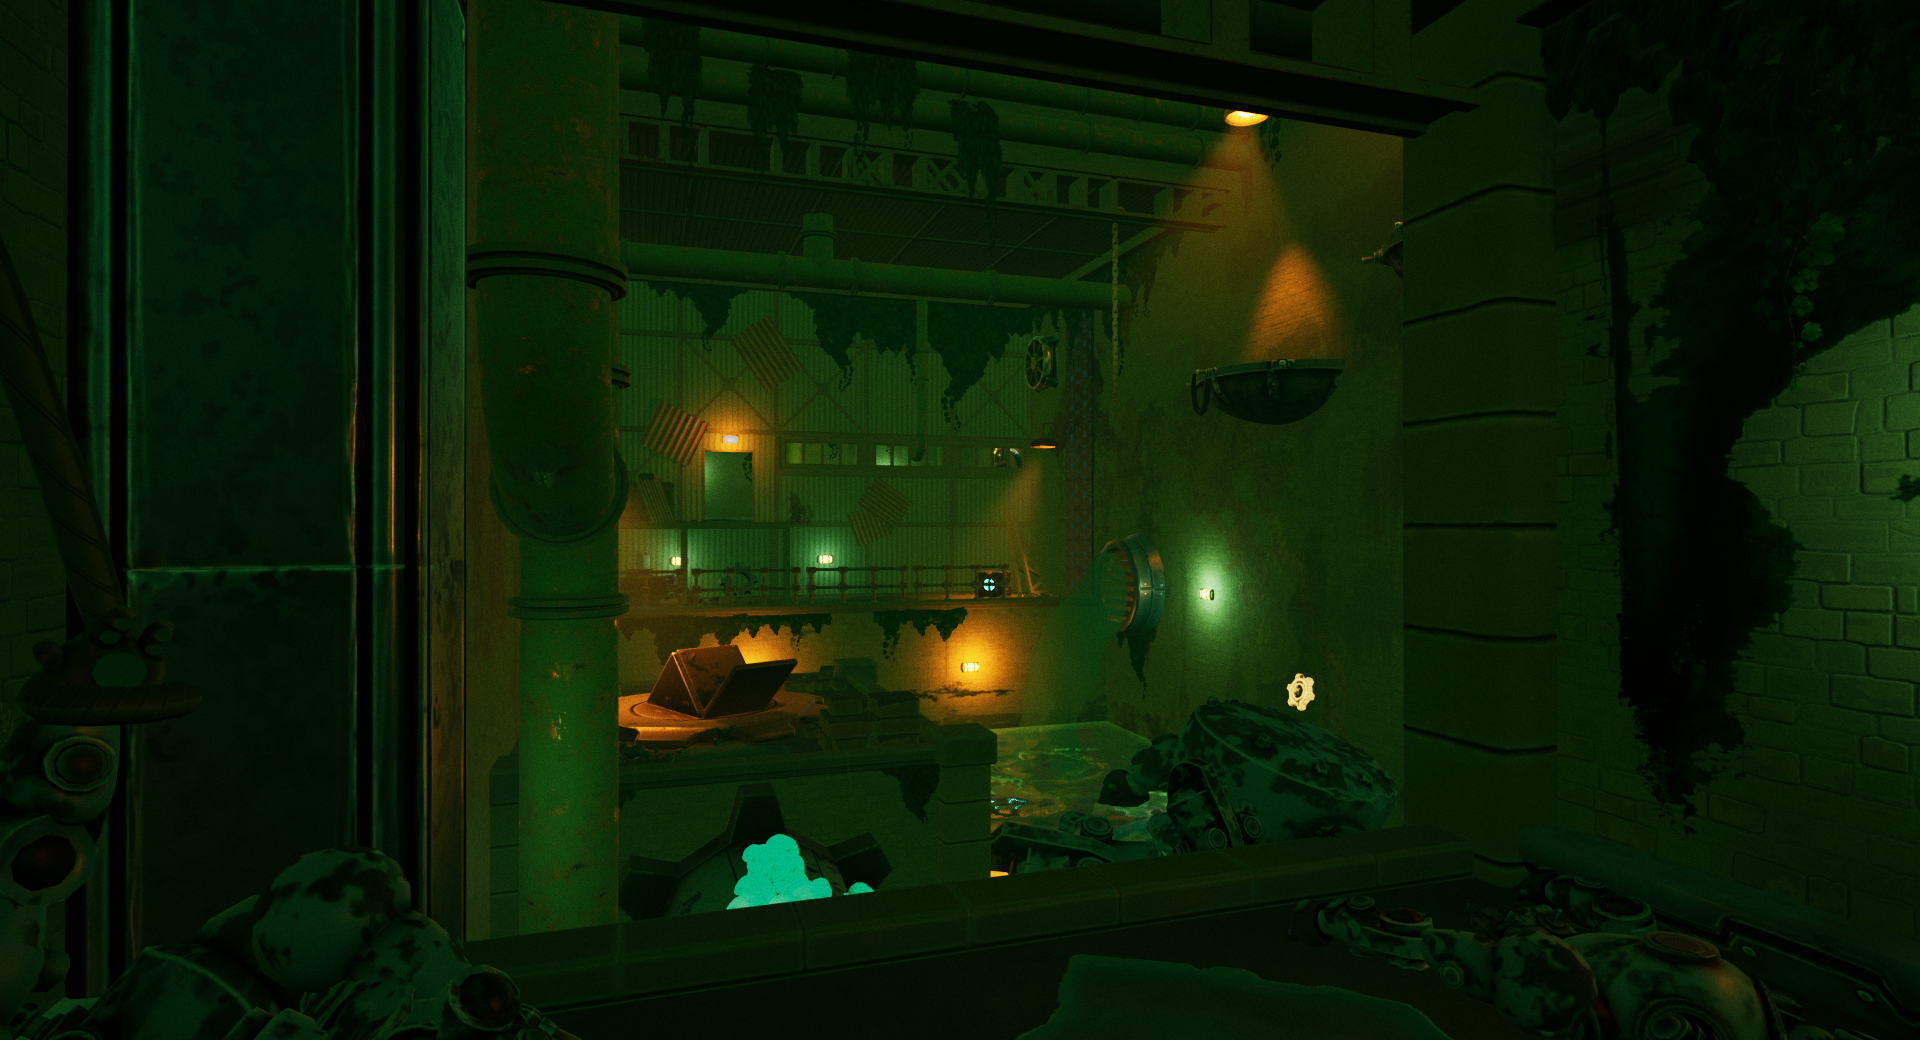


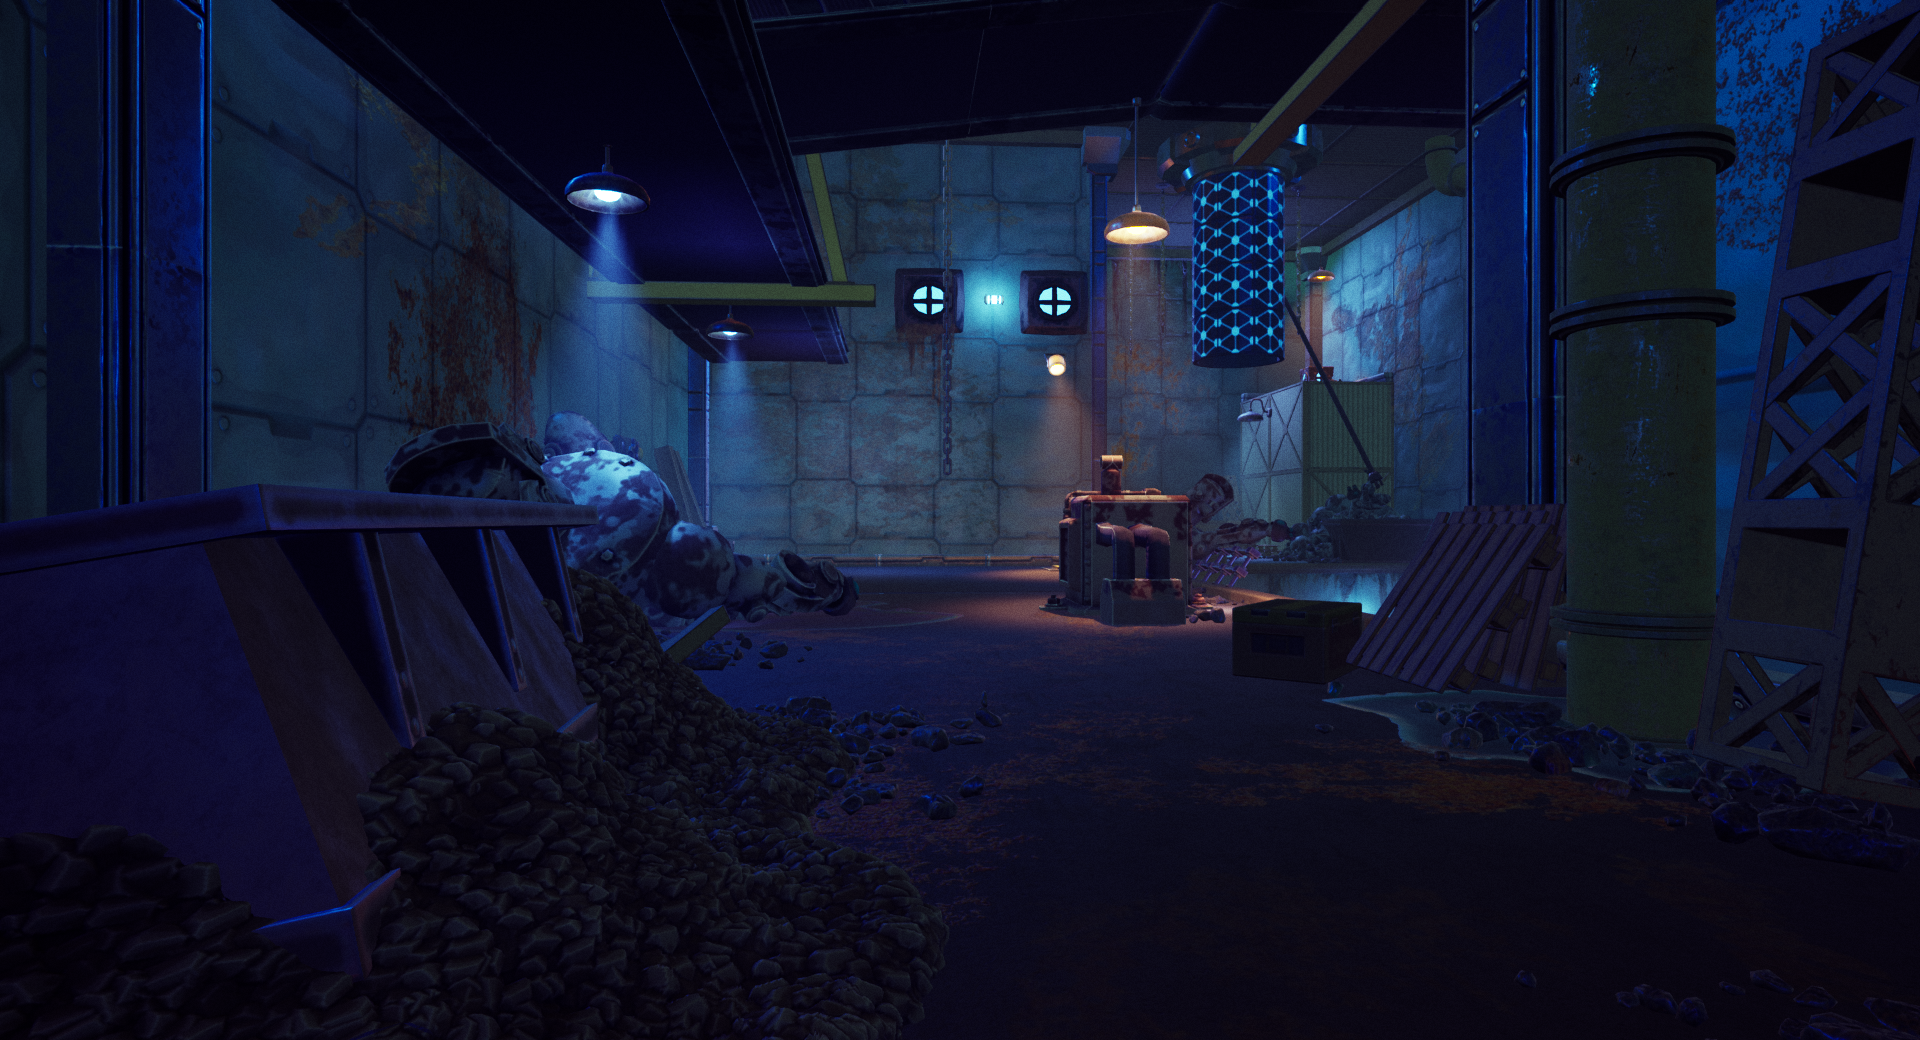
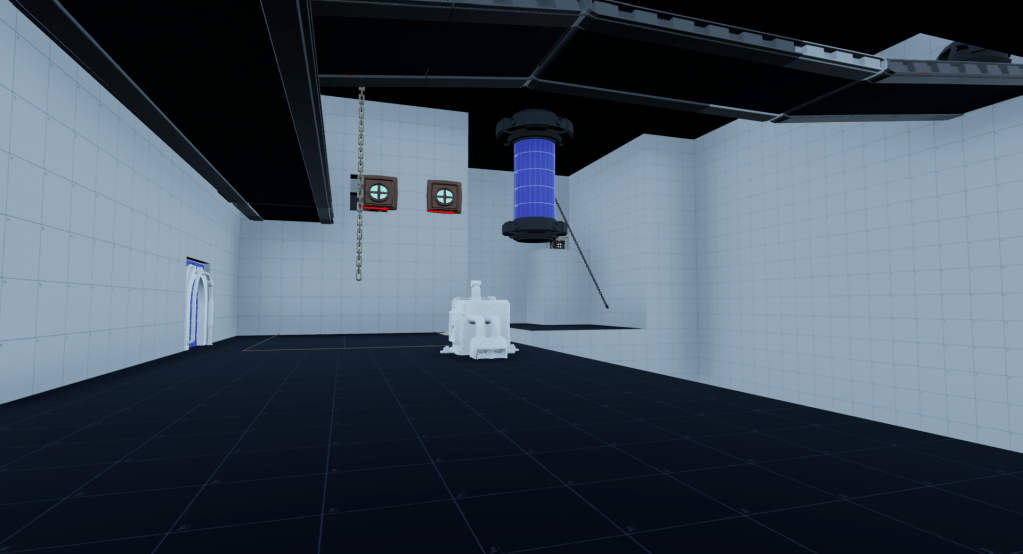
Below is a comparison of the same space seen above with the previous comparison, showing the difference between where this level was before the set dressing and lighting began, and after.

Step 8: Level Optimization
After finishing up the set dressing, our final task before wrapping up the project was optimization. We faced a major challenge with specific collision issues. I found that certain pipes, like those near unreachable walls or ceilings, didn’t need any collision at all. Others required collision, but the player couldn’t walk on them, so I used a single box to handle all of them. At this point, many items had complex collision set, even though simple collision would have sufficed. Due to time constraints in the art department, custom collisions for every item weren’t feasible, so we worked with what we had. Meanwhile, I kept an eye on the lighting complexity in the spaces. Although there were few instances of concerning overlap, I discussed them with the Lighting Artist when they arose. Collaborating with the Programming Lead, we discovered that many asset materials had unnecessarily high-resolution textures. By significantly reducing these textures, we added more frames to every space. By the end of this optimization phase, each room maintained a minimum of 60 FPS on my computer. While my monitors capped out at 120 FPS, some rooms did exceed these levels.
Key Takeaways:
Importance of Cross-Disciplinary Communication – In my role as Lead Designer for this project, maintaining constant communication with other disciplines was essential. Given my responsibility for the game’s overall design, ensuring seamless integration of all elements was paramount. Whenever a mechanic failed to function as intended, I would speak with the responsible programmer to discuss the issue and determine whether iterating on the mechanic or implementing it differently in the space would be more effective. Regarding art, I didn’t need to request iterations on specific assets; instead, I played a significant role in determining the game’s requirements and direction.
Understanding Playtesting Insights – I had always heard about the importance of playtesting, but I didn’t fully grasp its significance until I spent hours observing each playtester. Every playtest session provided valuable insights into the game, helping us identify areas and mechanics in need of refinement. While quantitative data was informative, I personally found qualitative feedback more valuable from a design perspective. Witnessing a player’s satisfaction upon solving a puzzle ignited a sense of accomplishment within me. Similarly, noticing a player’s silence in a particular area during the playtest helped me gauge their interest level. Additionally, the post-playtest questionnaires allowed players to provide feedback in their own words, offering sincere insights, both positive and negative, without our direct influence. This feedback was instrumental in guiding the project’s direction. I firmly believe that without the invaluable contributions of our playtesters, our game wouldn’t have achieved the level of cohesion and entertainment it has reached.
Challenges and Advantages of Remote Project Work – Given that I lived roughly an hour and a half away from the team’s primary location, I opted for a hybrid approach, working remotely twice a week. We scheduled all regular meetings on these two days, and I made sure to be present in person whenever leads needed to prepare for or deliver presentations. While I generally prefer working in person, adopting this hybrid method allowed me to better manage my time. Working remotely on certain days enabled me to save approximately three hours in commuting time, freeing up additional time for project work or personal endeavors.

You must be logged in to post a comment.