Project Type:
Personal Project | Level Designer
Software Used:
- Unreal Engine 4 – UE4 was used as the game engine. I used blueprints to edit the puzzle asset pack, as well as to create a few of my own mechanics.
- Adobe Illustrator – This software was used to create the digital layouts, reference board, and mood board for the project.
Gameplay:
Full Gameplay:
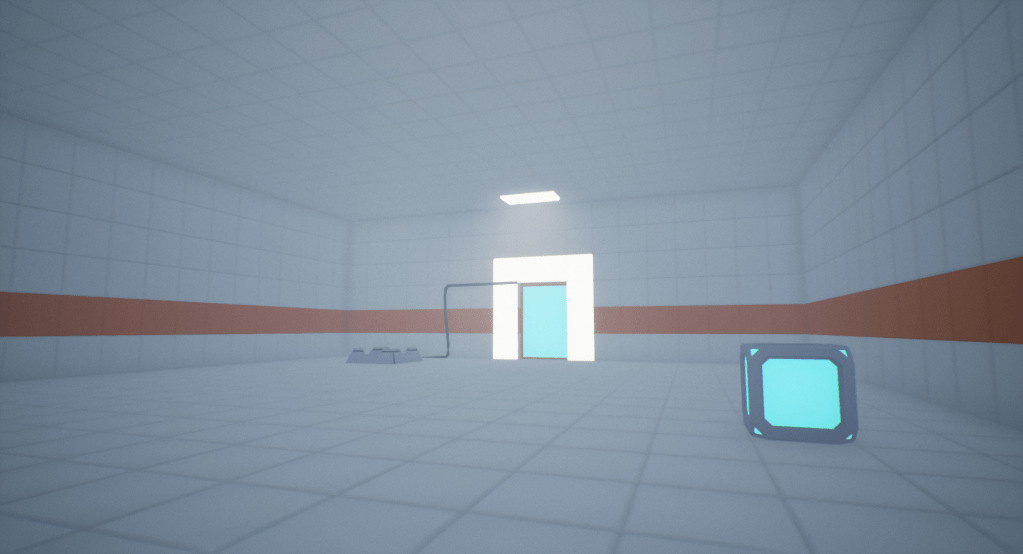
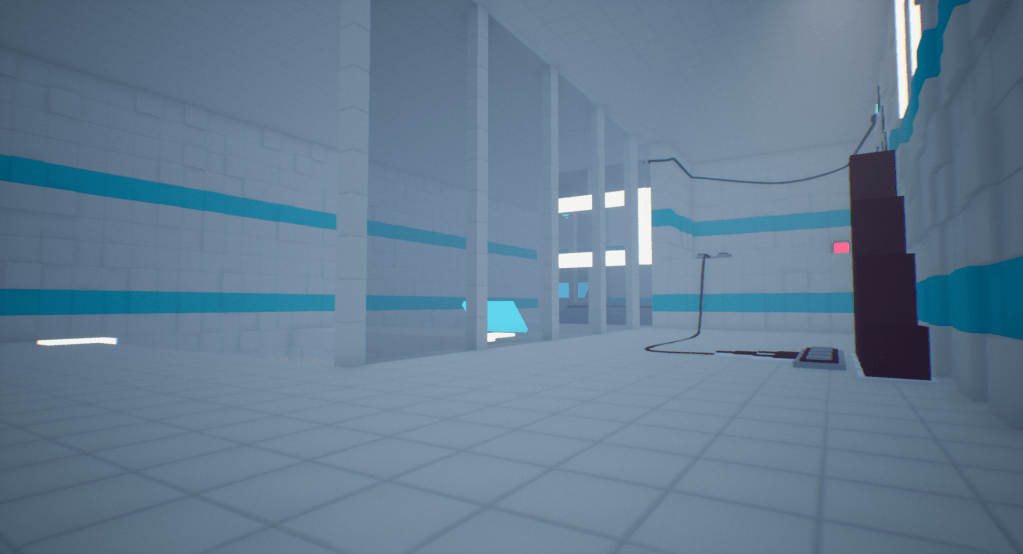
First Area:
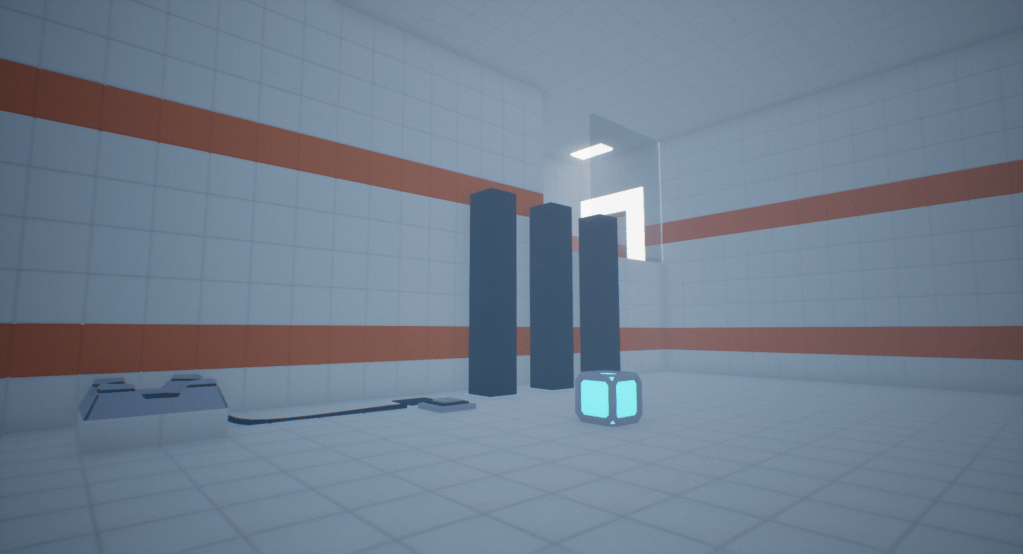
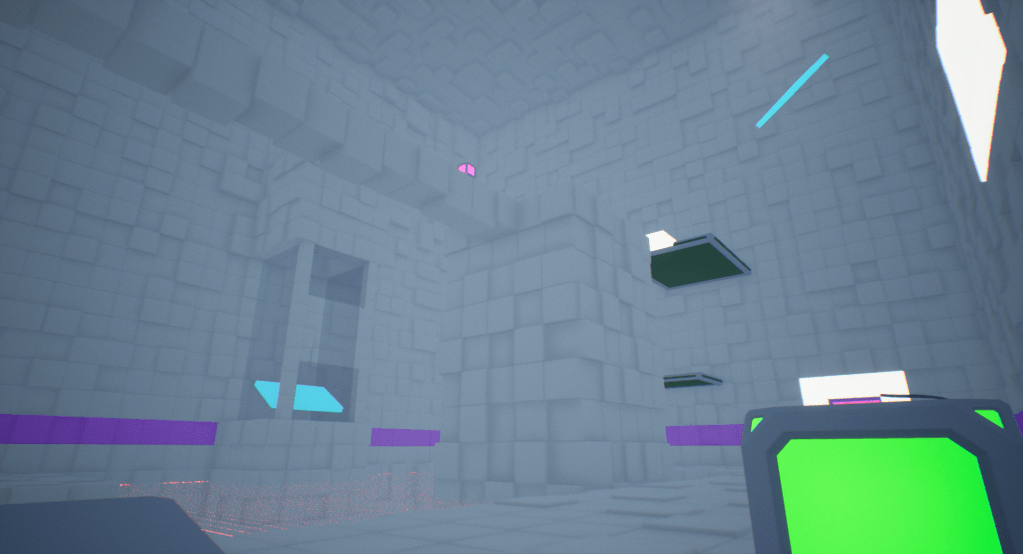
Second Area:
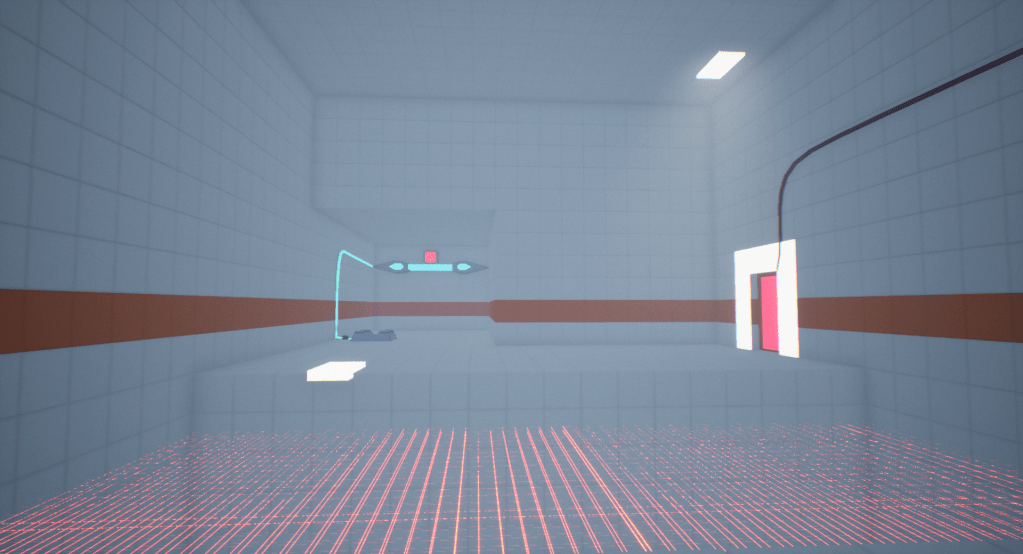
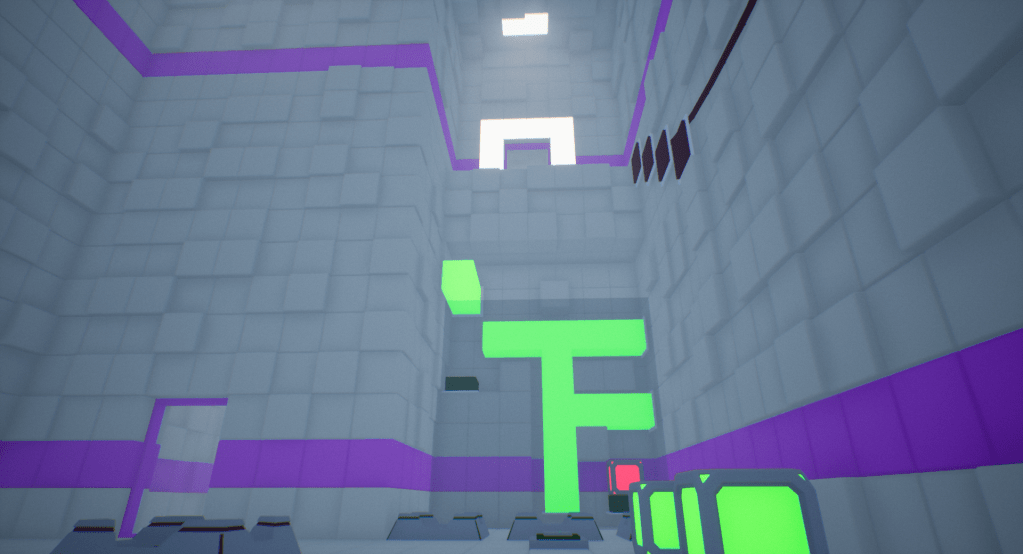
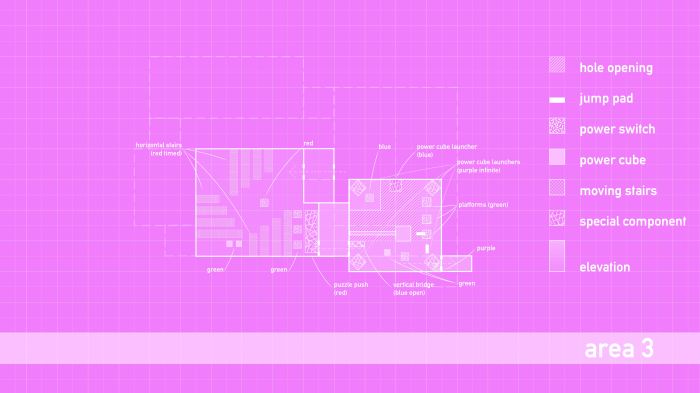
Third Area:
Responsibilities:
- Hand sketched ideas on paper.
- Implemented a puzzle asset pack for gameplay.
- Built action blocks in Engine to determine what was fun, and how those ideas could be iterated on.
- Created three layouts; each representing the three playable zones of the level.
- Whiteboxed the three playable zones of the level.
- Iterated on all elements of the whitebox, including lighting, placement of objects, difficulty of platforming, etc.
Inspirations:
- Portal Series – This series is a personal favorite of mine, but I was specifically inspired by the way the difficulty of each room ramps up over time, and how they are able to accomplish this through the way they teach the player the mechanics.
- Q.U.B.E. Series – While some mechanics were inspired from this game, the aesthetics of this series was a larger inspiration.
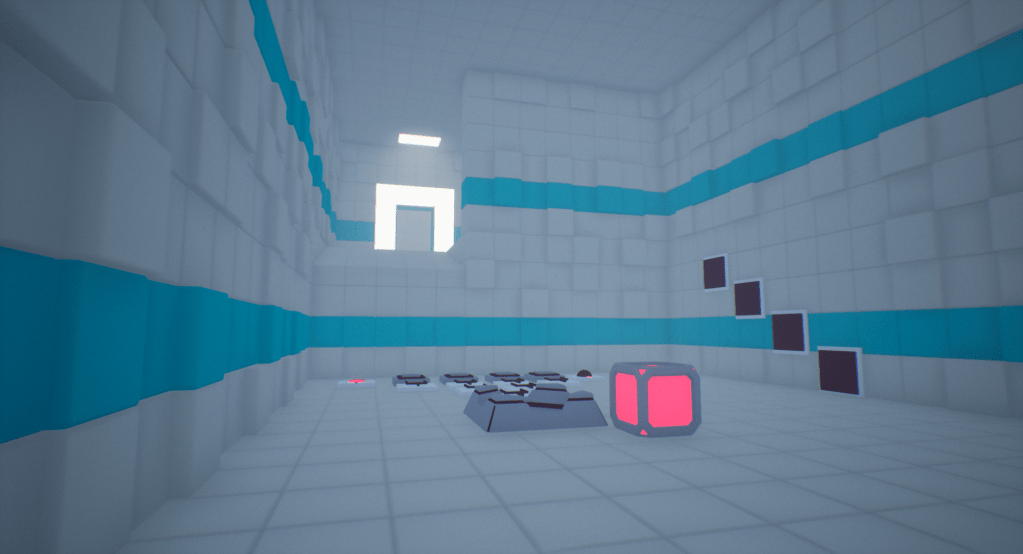
A Few Images:


The Process:
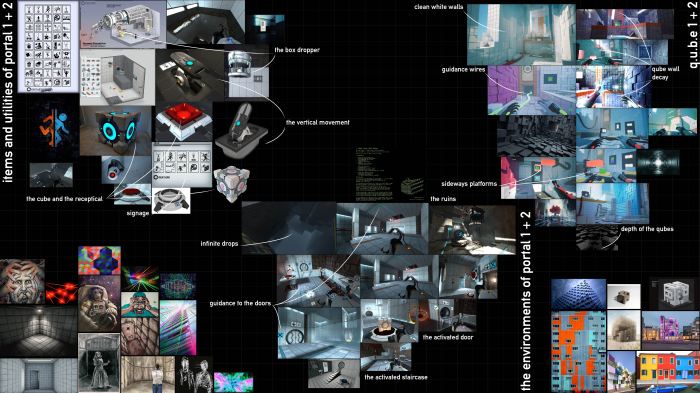
Step 1: Creation of the Reference Board
The reference board helped me bring together my ideas in the initial phase. Early on, I had already determined that I wanted this to be somewhat like a testing facility, similar to those in Portal. Each room was supposed to either teach or test the player a new idea or combination of new ideas. Because of this, Portal was the biggest inspiration for me for this project. This series is my personal favorite puzzle series ever, so it was nice to be able to learn from such an amazing series, and create a level in a similar style and layout. Q.U.B.E was used mainly as an aesthetic reference (mainly the walls and floors), but some of the mechanics were also inspired from this series. The imagery on the bottom left and bottom right were both artistic and real world imagery that helped me set the tone and mood of my level early on.
Step 2: Action BLocking
I started this process by hand drawing some basic puzzle concepts. I started with the simple pick up box, bring box to trigger, have trigger open door. From there, I started to expand my ideas. This entire step was done simultaneously while I was playing around with the asset pack I used, allowing me to get fresh ideas. Once I had a few ideas sketched out, I created them in Engine, and iterated on them based on how fun they were and what I needed to get out of them. These action blocks also helped me realize that I needed to create some of my own blueprints to complement the asset pack I chose. This step was crucial, because creating my own mechanics really helped expand the potential within the project.
Step 3: Creation of the Layouts
After creating the action blocks, I was ready to start laying out the spaces. For this project, I wanted to separate the three major spaces into separate layouts. This process helped me better determine what I was going to be teaching to the player in each space, as well as I what I was expecting the player to understand in each space. Because Portal was a big reference for the design of these levels, I decided a traditional blueprint-grid layout would help bring the ideas together cleanly. The colors used for each of these areas is also represented in the actual level. Orange is used in the first five rooms, blue is used in the next three rooms, and purple is used in the final two rooms.


Step 4: Creation of Level in Engine
This step obviously took the longest, but having action blocks and level layouts to refer back to really helped me through this process. I started with the very first room, and built the whole room before continuing to the next. This was the same process I followed for each room. This way, I knew what was behind me was already complete. Once I completed the production of the walls and the mechanics, I went back and did a pass on the walls. As you’ll notice through the playthrough, the walls and floors get more distorted as the game progresses. This was intentionally done in this phase, and was heavily inspired by Q.U.B.E.
Blueprints:
Throughout the process of this whitebox, I wanted to make sure I was able to add in a few of my own Blueprints to make sure I was getting the experience, while also adding to the functionality of the spaces.

The above Blueprint is for the BP_KillLaser in the project. This is the red lasers that you see in the project, that when the player interacts with, restarts the room for them. I worked with camera fading on this blueprint, calling a camera fade in to fade the camera to black, then change the player’s location, and then fade back in.

This Blueprint was for the BP_Trampoline, which is what launched the player and the boxes. What I did here was separate out whether or not the overlapping object was the player or not. In this game, the only actors that can move are the player and the boxes, so I knew if the player was not what was overlapping, then the only other overlap could be a box. Each of the XYZ values were made editable in the editor, so I could define how far I wanted the player to move on each specific platform. When the player overlaps, the player will be launched. When a box overlaps, it gets a little more complicated. I had to first determine the Linear Physics Velocity, to then add an impulse to the box. Because the trampolines for the boxes were continuously spawning, I would then have a short 3 seconds before spawning another one. Each of the XYZ values were made editable in the editor, so I could define how far I wanted the player to move on each specific platform. The spawning XYZ values were also able to be edited in the editor, so I could set where each box would be spawned. This allowed me to have multiple of these launchers in the level.
Key Takeaways:
Importance of Action Blocking – Most of the puzzle rooms created for this level were first action blocked on a separate map first. This allowed me to see what ideas were fun, intriguing, and actually plausible. I strongly believe that had I not action blocked these ideas first, this process would have both taken a longer time, and also not have been as cohesive.
Teaching the Player the Mechanics – The thing about puzzles is that usually, the player wants to be tested. Many people who enjoy puzzle games enjoy them for the satisfaction of completing the puzzle. But, if the player doesn’t understand the mechanics, then it will be near impossible for them to have fun, let alone complete all of the puzzles. Keeping this in mind really helped me think about how I was going to introduce each idea, and how I would expand on those ideas over time.
Visual Scripting in Unreal Engine – An asset pack was used for the main mechanics of this level (the boxes, the trigger pads, the doors, etc.) However, I needed to go into the existing blueprints and modify them to be more specific to the level I was creating. I also had to create a few blueprints of my own to complement the rest of the spaces. The launchers and kill boxes were created by me.

You must be logged in to post a comment.